Like when sending a singular merge to a Contact, you can choose to type the content from scratch or use a Template when sending a bulk merge to multiple Contacts. Using Templates will allow you to use merge tags that'll pull in information from the attached records.
Example - if you're building a Letter Template, the Contact you'll send to will constantly change. Rex can use a merge tag for the Contact's name, and it would change for each person you send the letter to.
For more information on creating the Templates, see Creating Merge Templates.
When sending to multiple Contacts, you'll be presented with a 3 Step Process. Keep in mind - you'll have the ability to send the bulk merge to your Contacts from the list view of any of the three major modules in Rex:
- Contacts
- Properties
- Listings
Below are steps on sending;
In the below steps, we'll be using a bulk Email merge as the example. For further info on sending a bulk Mail/Letter merge, see Mail Merge/Bulk Mail Merge.
Step 1
When you want to send using a Template, without an attachment:
-
Go to the module you wish to send from (Contacts, Properties or Listings)
- Tick the checkbox next to the records you wish to send to
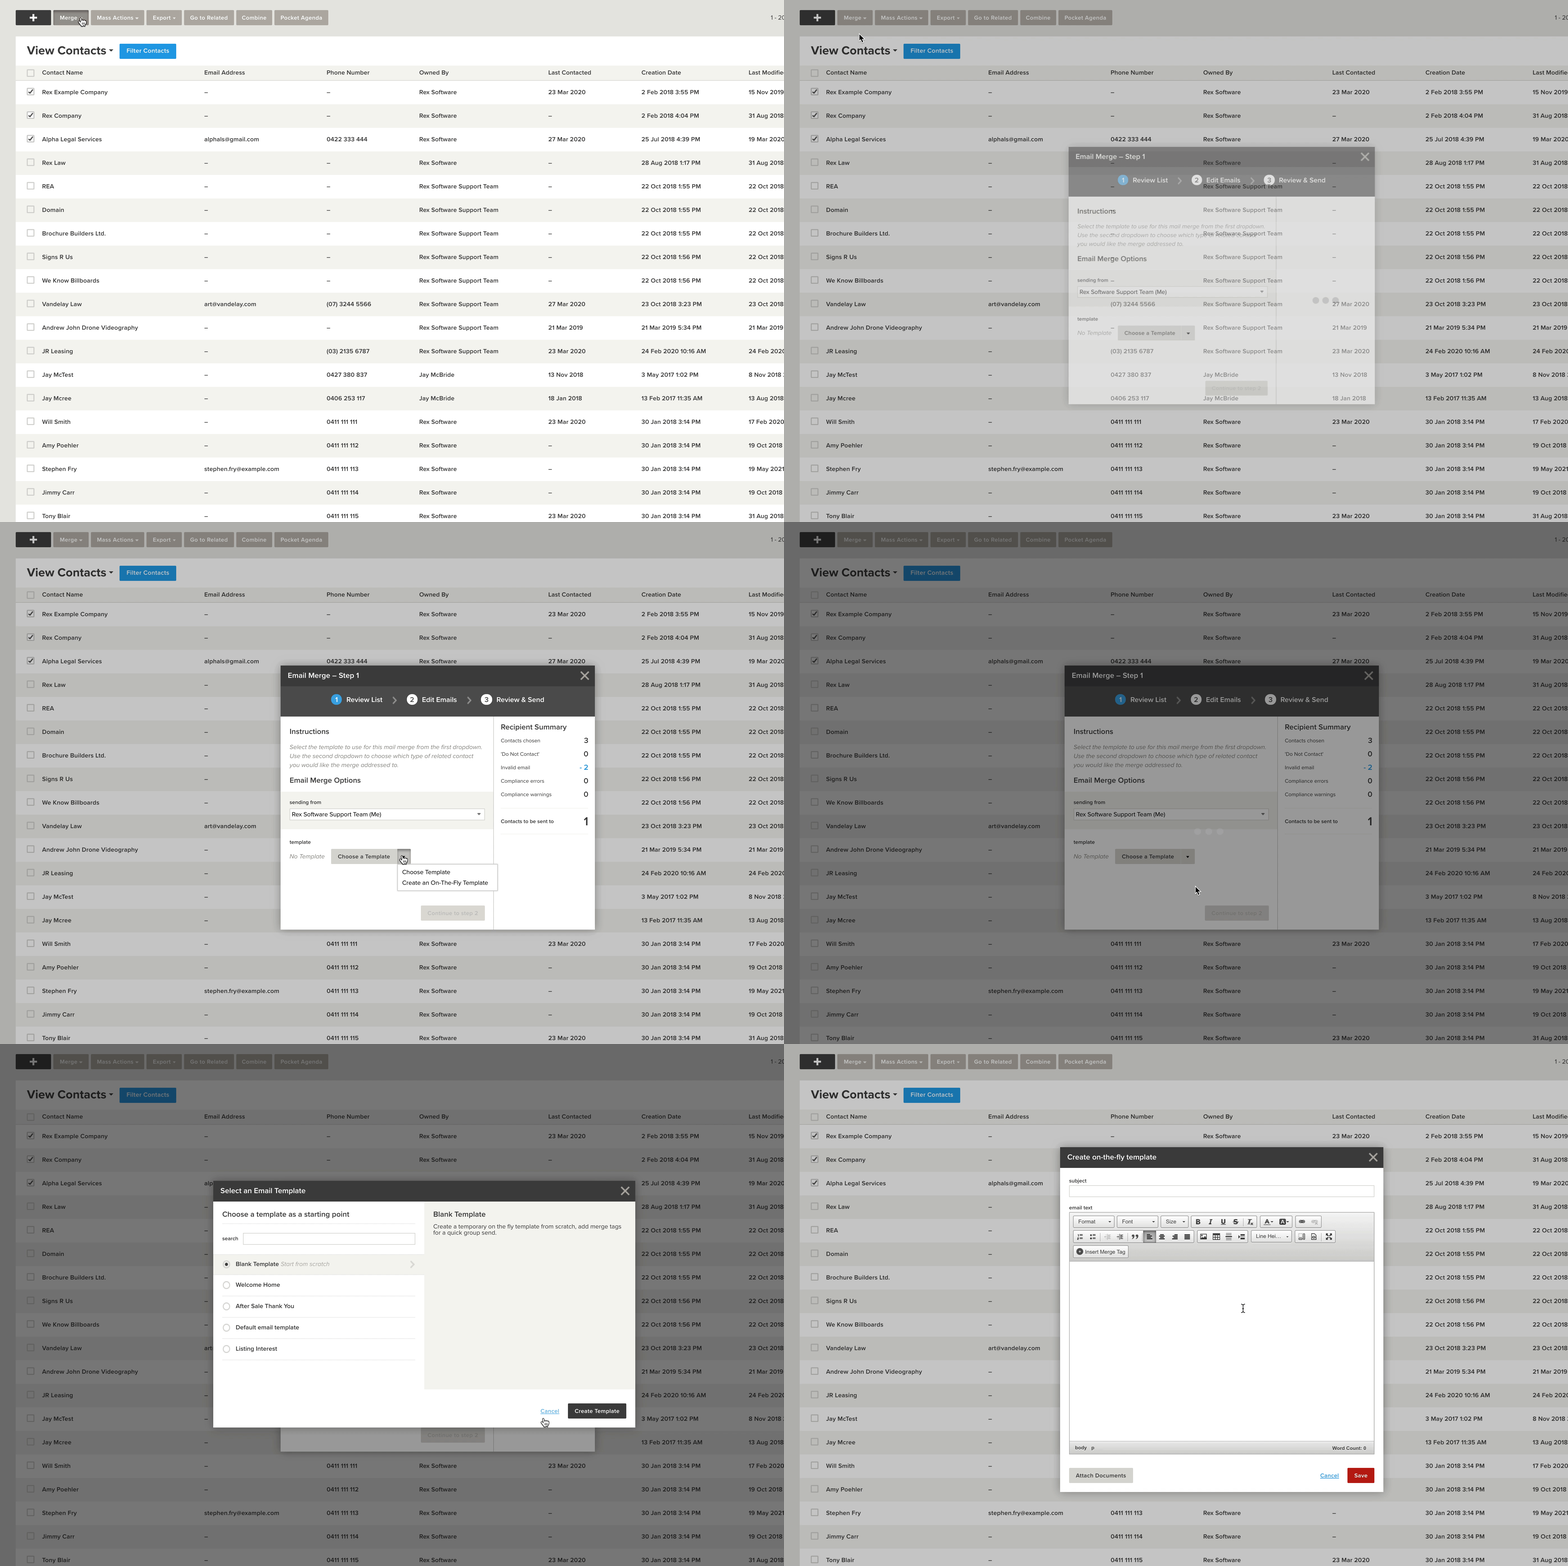
- Click on 'Merge' > 'Email'
- Click the dropdown menu under 'From' to select who you wish the email to appear as coming from
- Click 'Choose a Template'
- Choose the template you wish to use and click 'Save'
- If sending to Property or Listing Records, choose your recipient under 'Sending To'
- Click 'Continue to Step 2'
When you want to build on the go, and not use a template - or include an attachment:

- Follow above steps from 1 through to 4
- Click on the drop down to the right of 'Choose a Template'
- Click 'Create an On-The-Fly Template'
- Choose the template you wish to use as a starting point - or there's an option for a blank template
- Click 'Create Template'
- Enter a Subject
- Enter your Text
- If you want to include an attachment, click 'Attach Sending an Email/SMS/Letter to Multiple Contactss' - for more info regarding attachments, see: Merge: Adding Attachment to an Email Merge
- Click 'Save'
- If sending to a Property or Listing Record, choose your recipient under 'Sending To'
- Click on 'Continue to Step 2'
Step 2
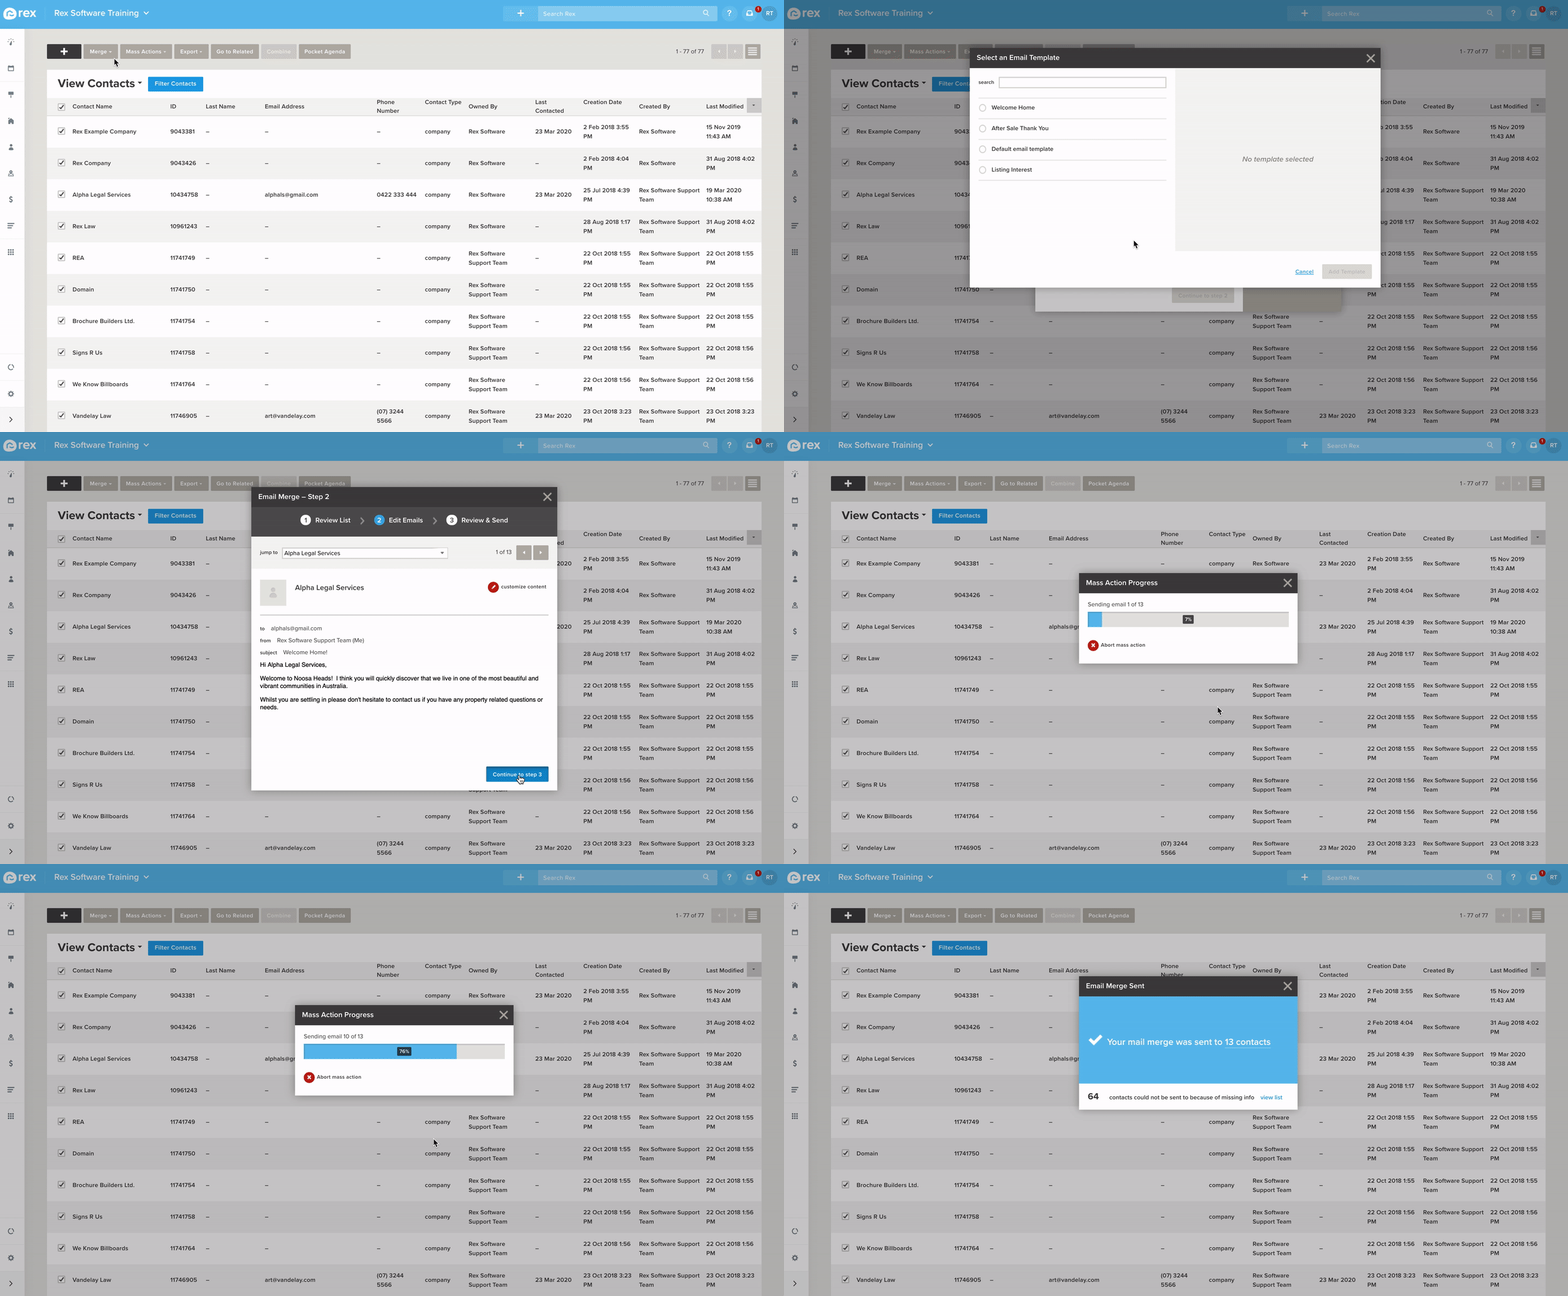
This step is used to check individual merges - you can edit the content if you need to.
- To change the merge you're viewing, either;
- Click the 'Jump To' drop down menu and choose another merge
- Use the left and right arrows
- Click the Red button next to 'Customize Content' for the currently viewed merge
- When finished, click 'Continue to Step 3'
Step 3
This step is used to review the campaign. You'll have a breakdown of;
- Who the merge is coming from
- What template is used
- If sending from the Property or Listing module, which Contact you're sending to
- How many Contacts the merge will attempt to send to
- How many are not eligible - eg. no email address entered on their Contact record, etc.
- How many messages have been modified
- Finally, how many Contacts that the merge will actually be sent to.
When you've reviewed the information and are ready to send, click 'Send Campaign'.
If sending a bulk SMS merge, just follow these steps;
Step 1
When you want to send an SMS using a template:

- Go to the module you wish to send from (Contacts, Properties or Listings)
- Tick the checkbox next to the records you wish to send to
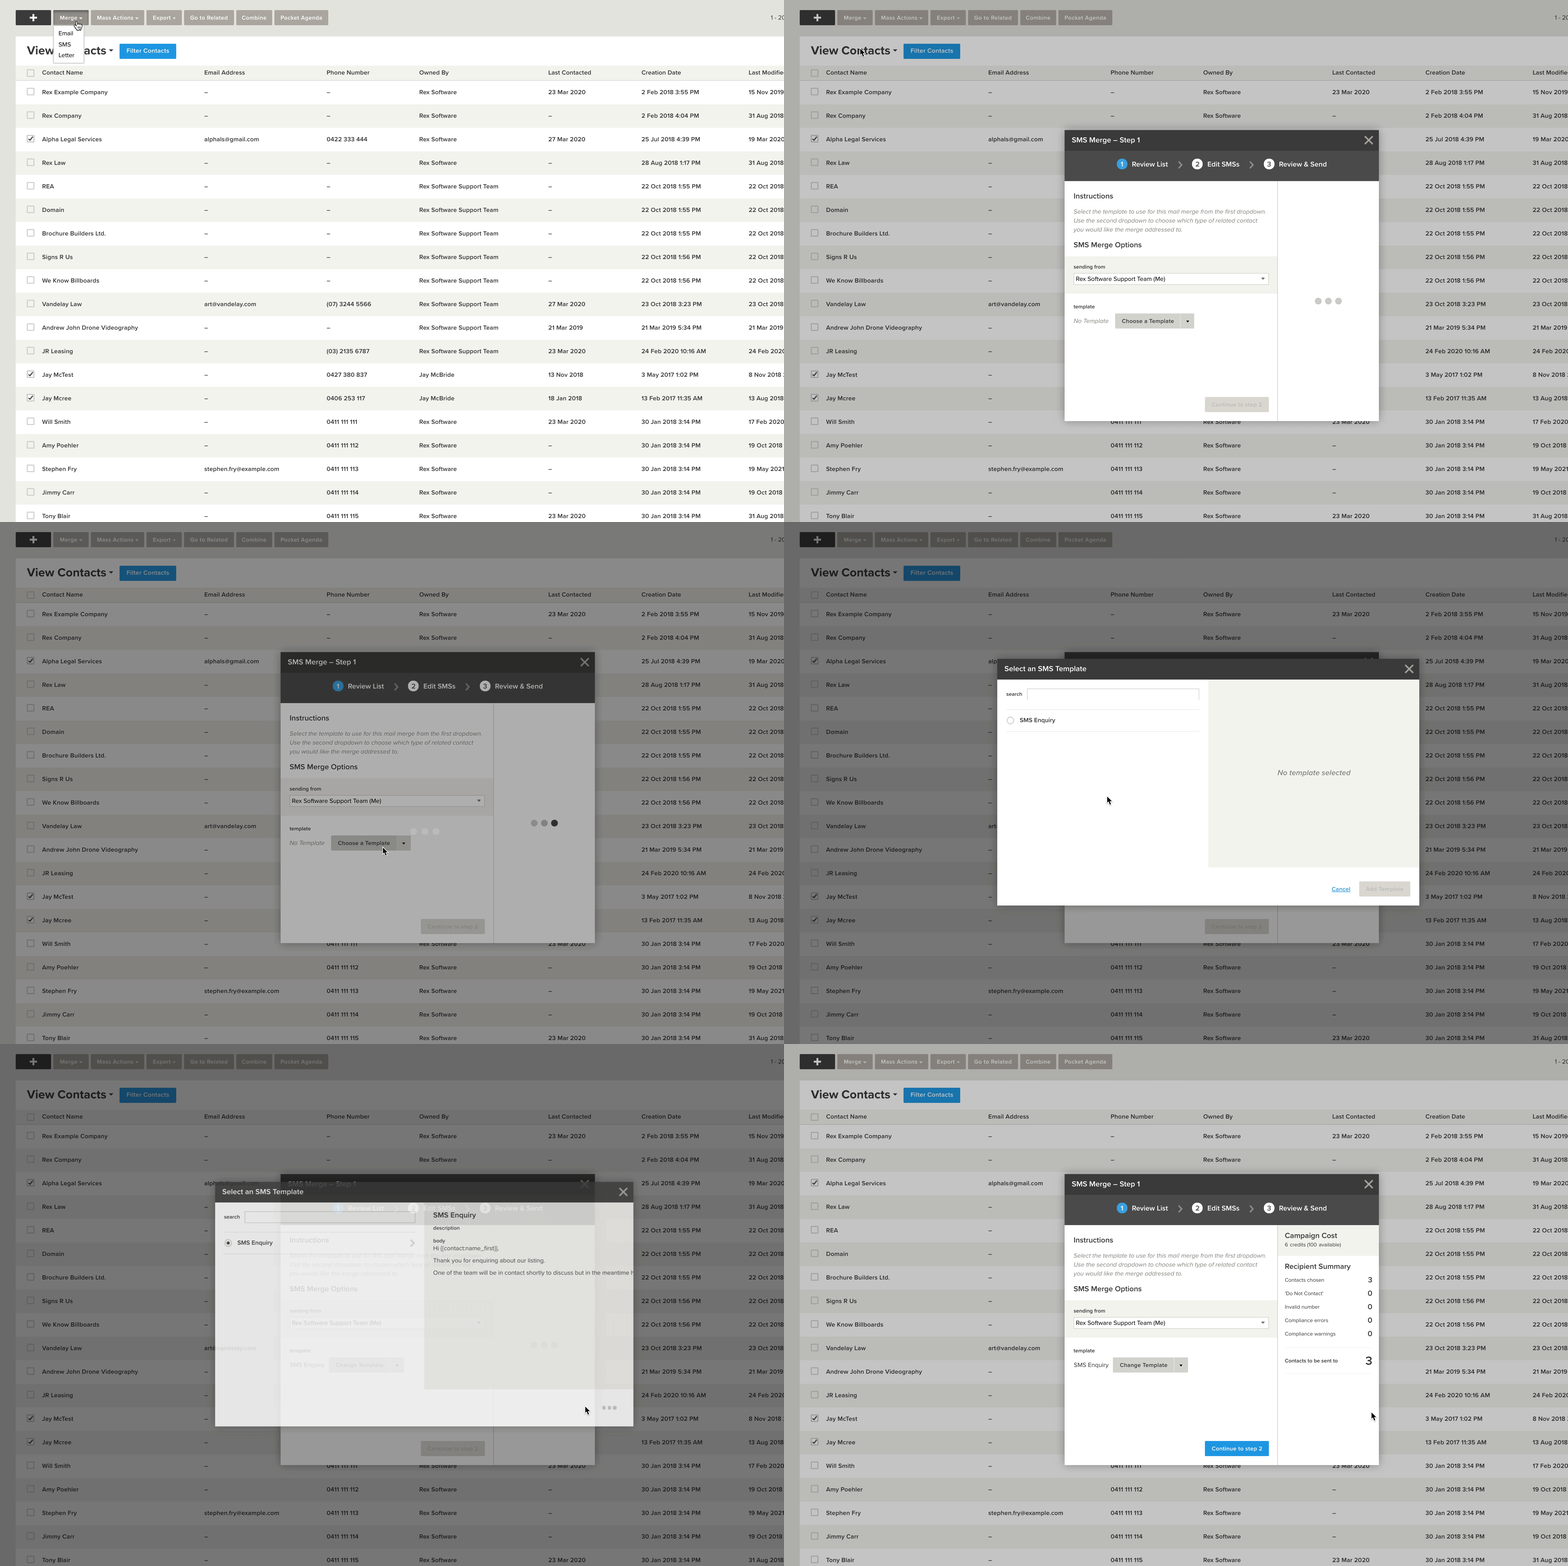
- Click on 'Merge' > 'SMS'
- Click the dropdown menu under 'From' to select who you wish the SMS to appear as coming from
- Click 'Choose a Template'
- Choose the template you wish to use and click 'Save'
- If sending to Property or Listing Records, choose your recipient under 'Sending To'
- Click 'Continue to Step 2'
When you want to build on the go, and not use a template:

- Follow above steps from 1 through to 4
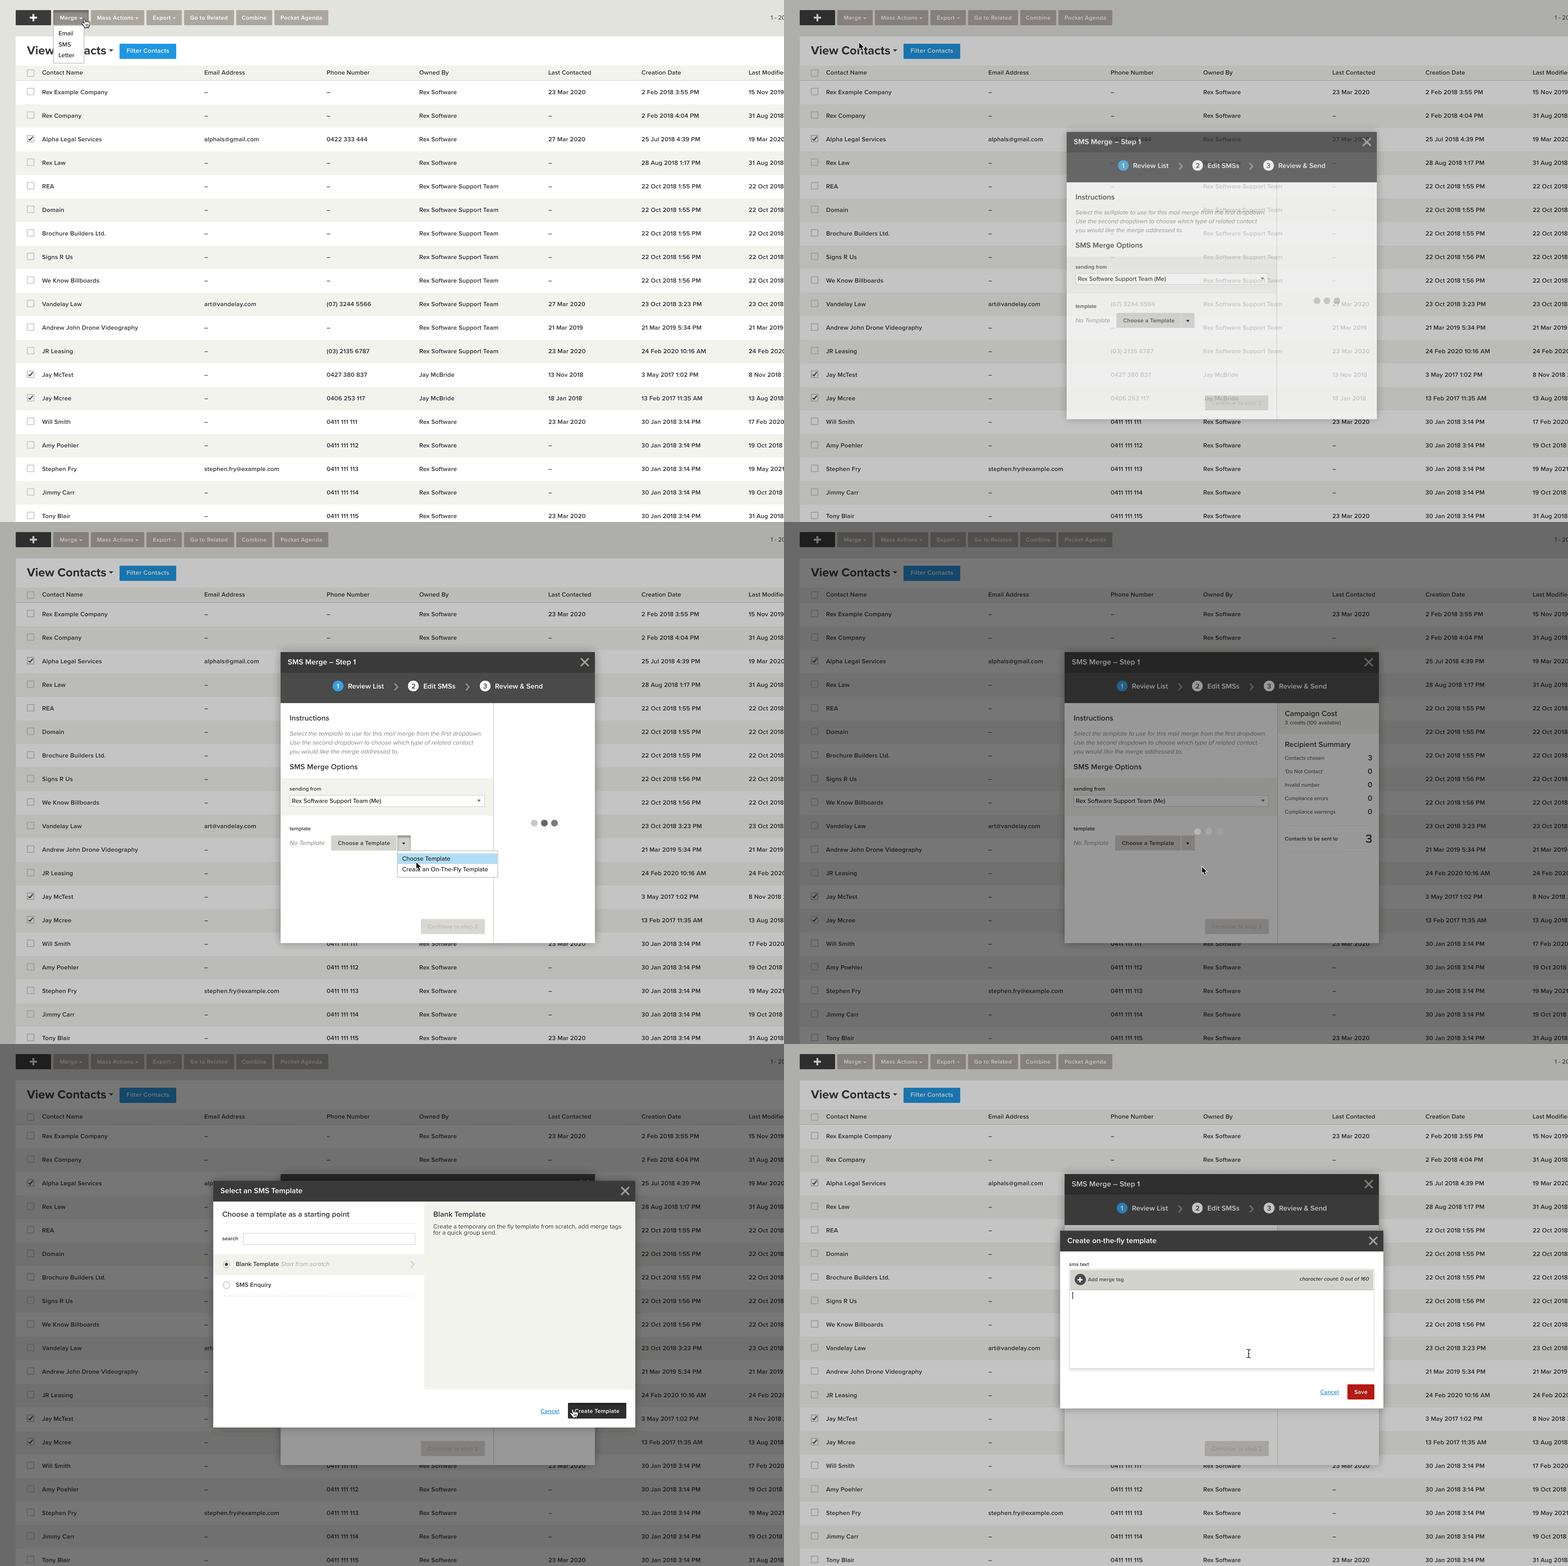
- Click on the drop down to the right of 'Choose a Template'
- Click 'Create an On-The-Fly Template'
- Choose the template you wish to use as a starting point - or there's an option for a Blank Template
- Click 'Create Template'
- Enter a Subject
- Enter your Text
- Click 'Save'
- If sending to a Property or Listing Record, choose your recipient under 'Sending To'
- Click on 'Continue to Step 2'
Step 2
This step is used to check individual merges - you can edit the content if you need to.
- To change the merge you're viewing, either;
- Click the 'Jump To' drop down menu and choose another merge
- Use the left and right arrows
- Click the Red button next to 'Customize Content' for the currently viewed merge
- When finished, click 'Continue to Step 3'
Step 3
This step is used to review the campaign. You'll have a breakdown of:
- Who the SMS is coming from
- What template is used
- If sending from the Property or Listing module, which Contact your sending to
- How many Contacts the SMS will attempt to send to
- How many are not eligible - eg. no mobile phone 'SMS' number entered on their Contact record, etc.
- How many messages have been modified
- Finally, how many Contacts that the SMS will actually be sent to.
When you have reviewed the information and are ready to send, click 'Send Campaign.