Processing Leads is a vital step to make sure that all of your inbound enquiries have been answered. The Leads Add-On allows contacts and listings to be linked to the enquiry, with any additional information they might have requested, which allows you to then make contact with them.
While the leads themselves show up on the contact and listing streams, processing them allows you to add any additional information about the outcome of that lead, and can then be shown on the Vendor Report you generate on that listing.
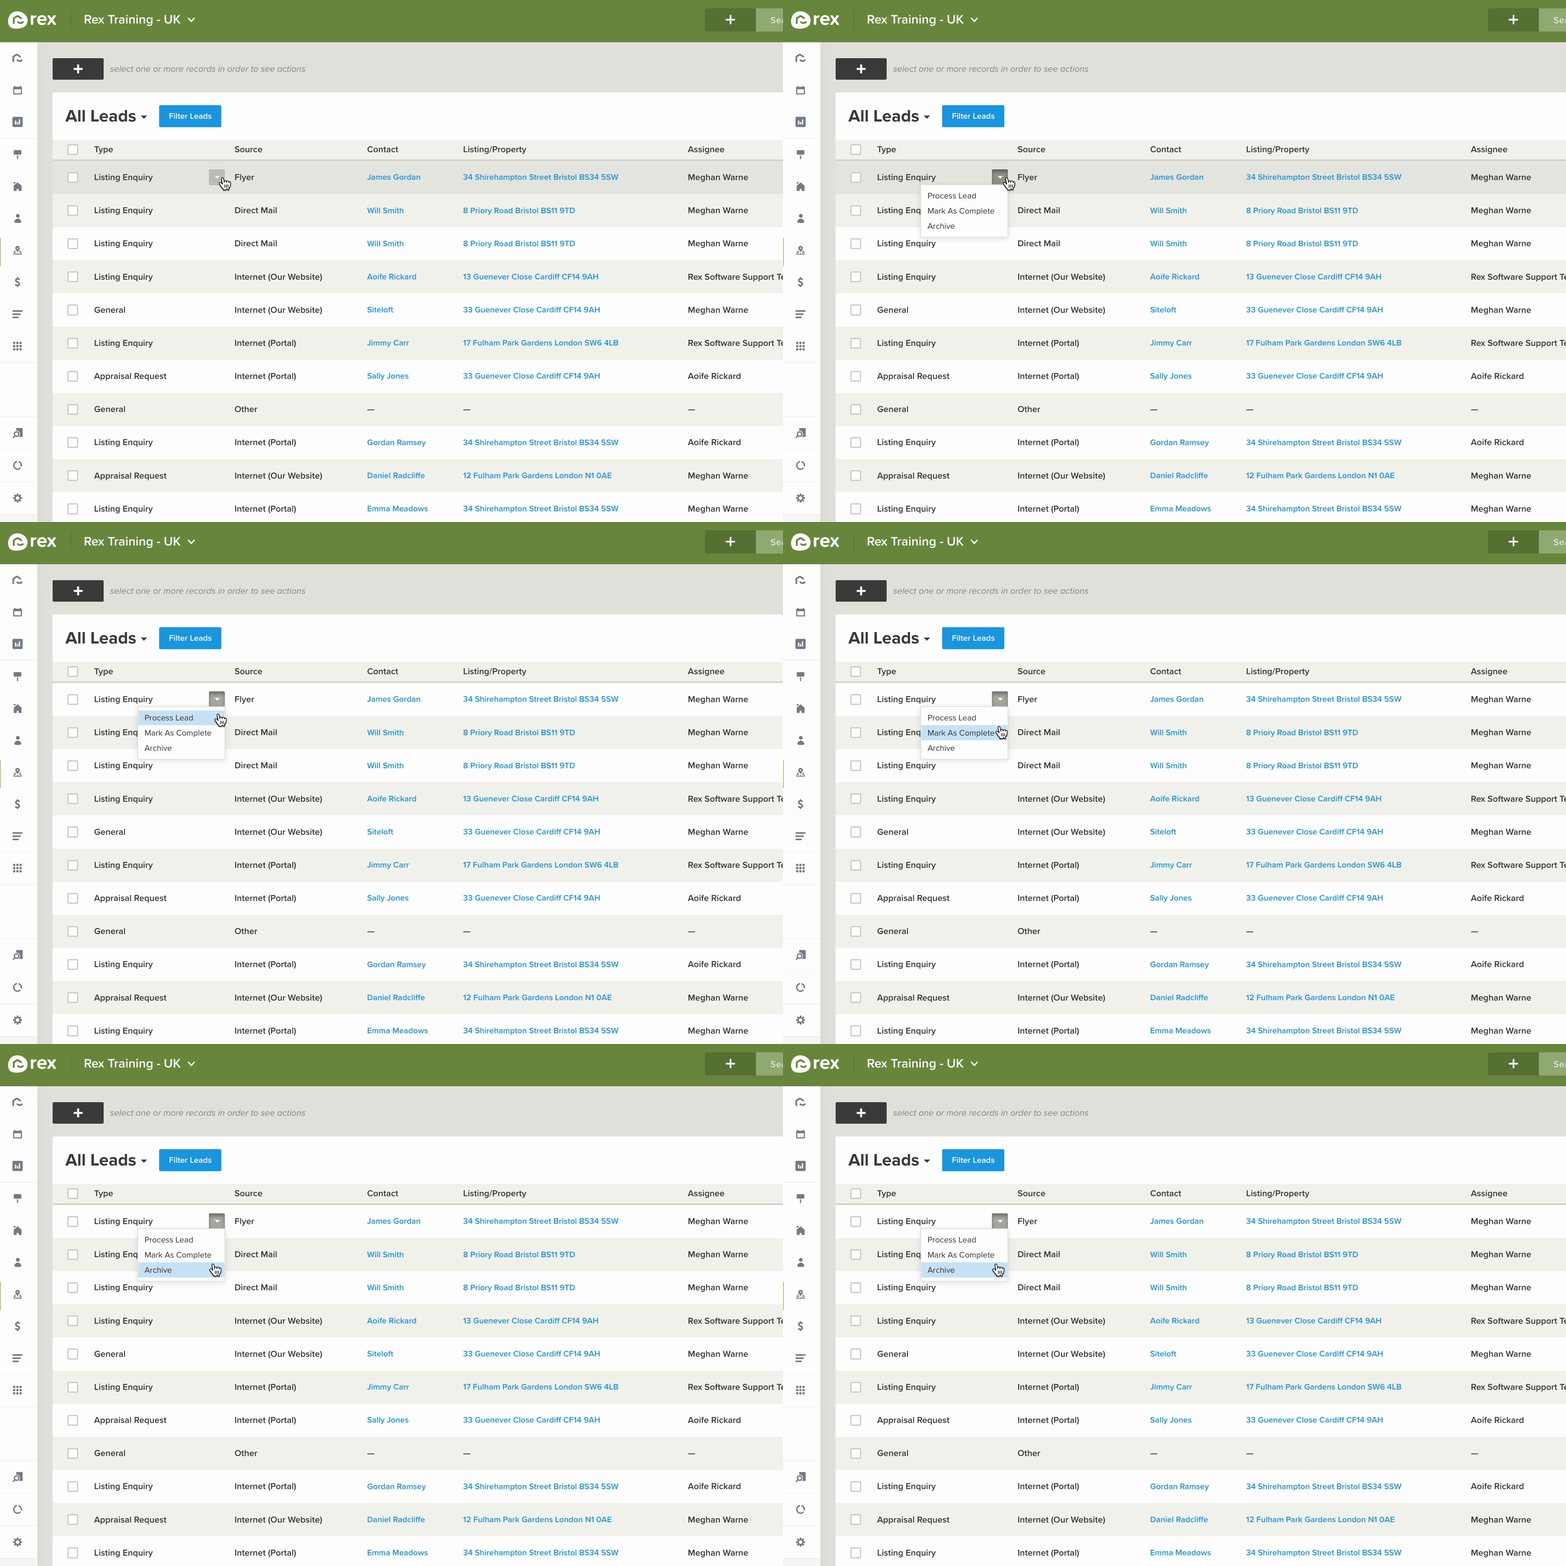
Drop down from the lead:
When hovering over the lead, you'll see a drop-down button appear that will give you a few actions you can take on the lead. This is where you can Process, Mark As Complete or Archive the Lead:

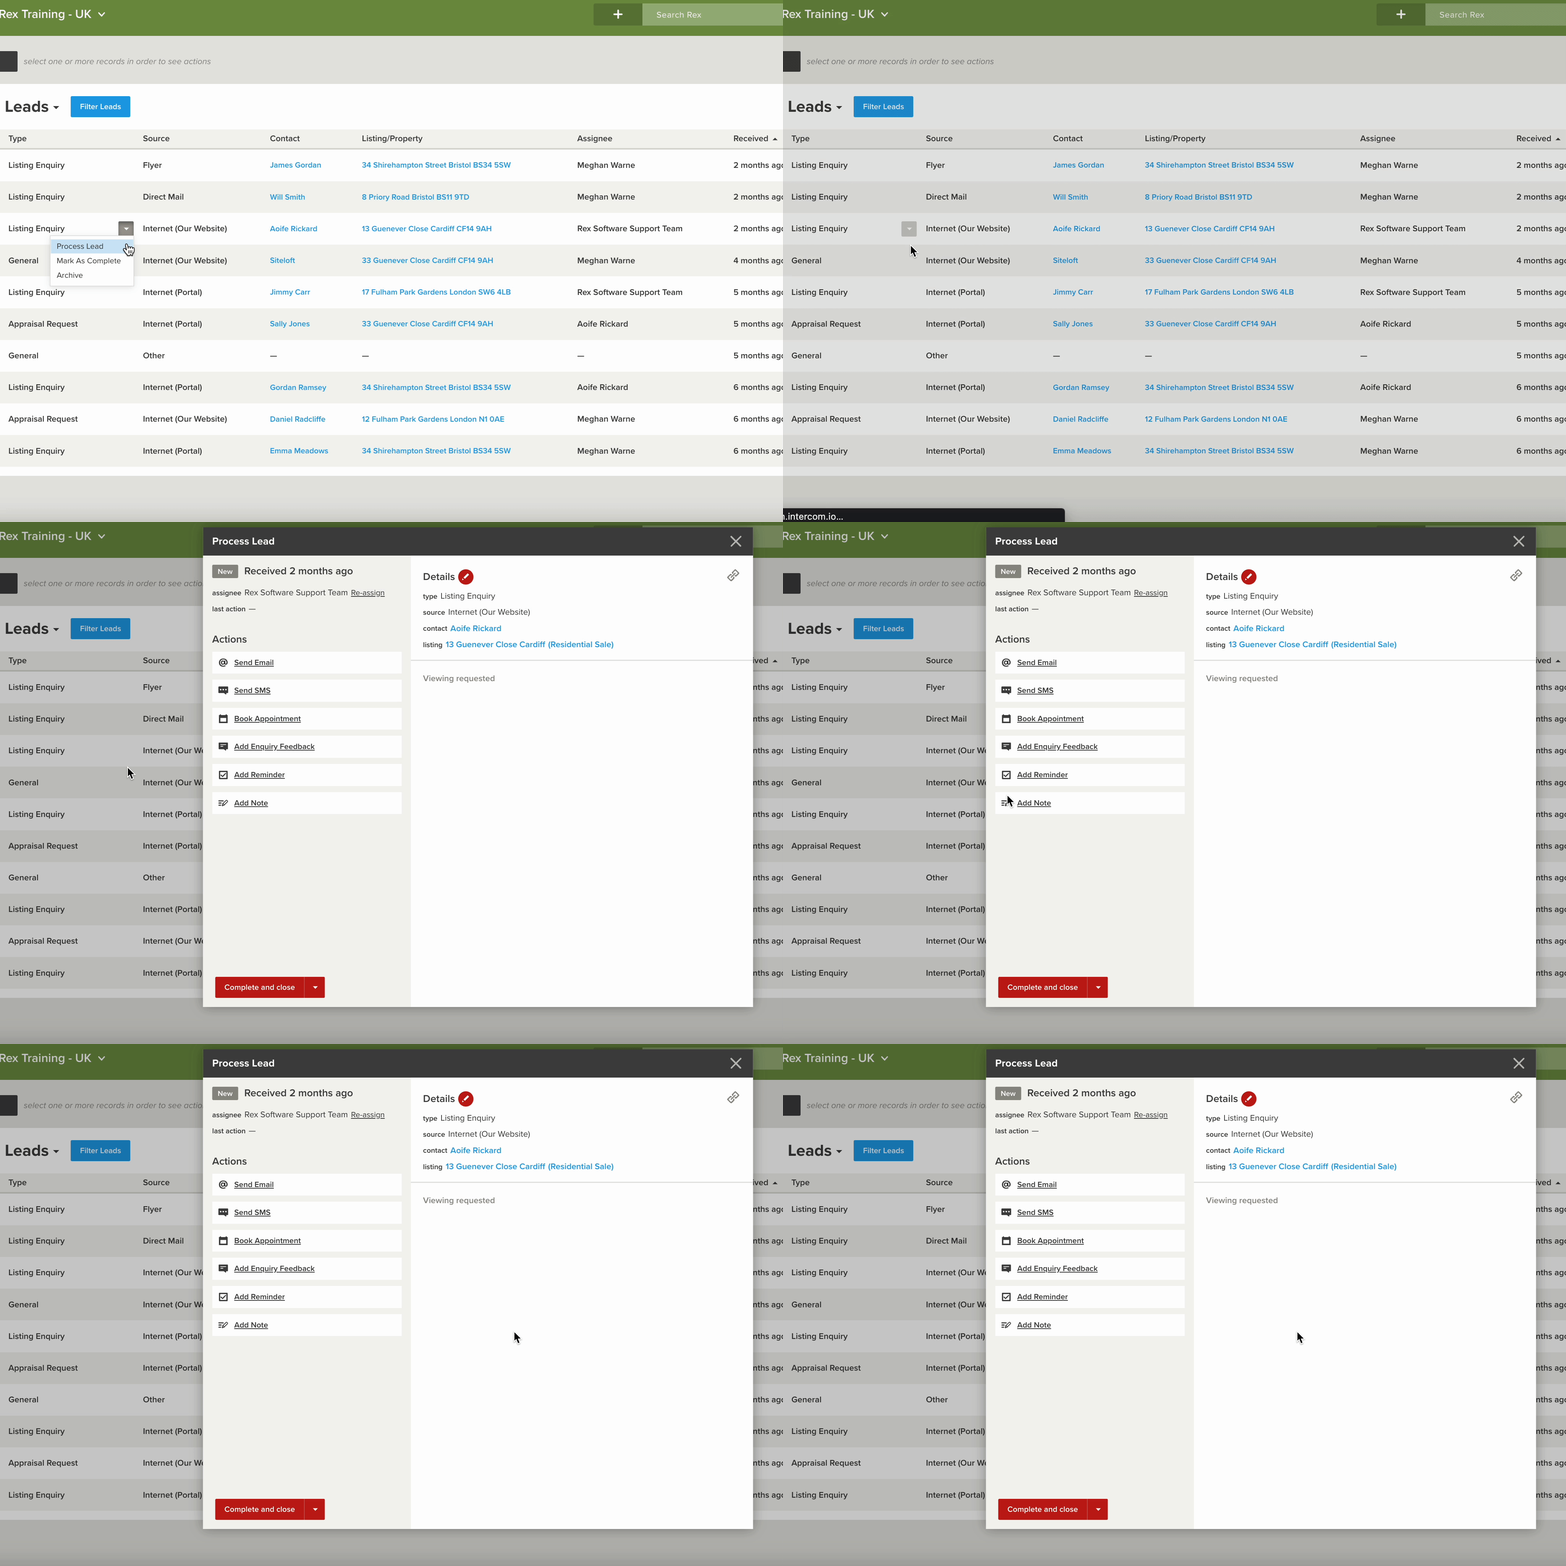
Completing the Lead from here:
Once the lead is linked to a listing and contact, you can start to process and complete it.
This would mean making contact with the client who has enquired on your listing, and then leaving a note or feedback entry before marking it as complete.
There are a few options that allow you to complete your leads:
- Process Lead:This will open a window with more options on processing the Lead
- Mark as Complete: Selecting Mark as Complete will simply mark the lead as complete, with no further action. Ideally, you would only use this option if you have made notes or added feedback prior to marking this lead as complete
Process Lead Window
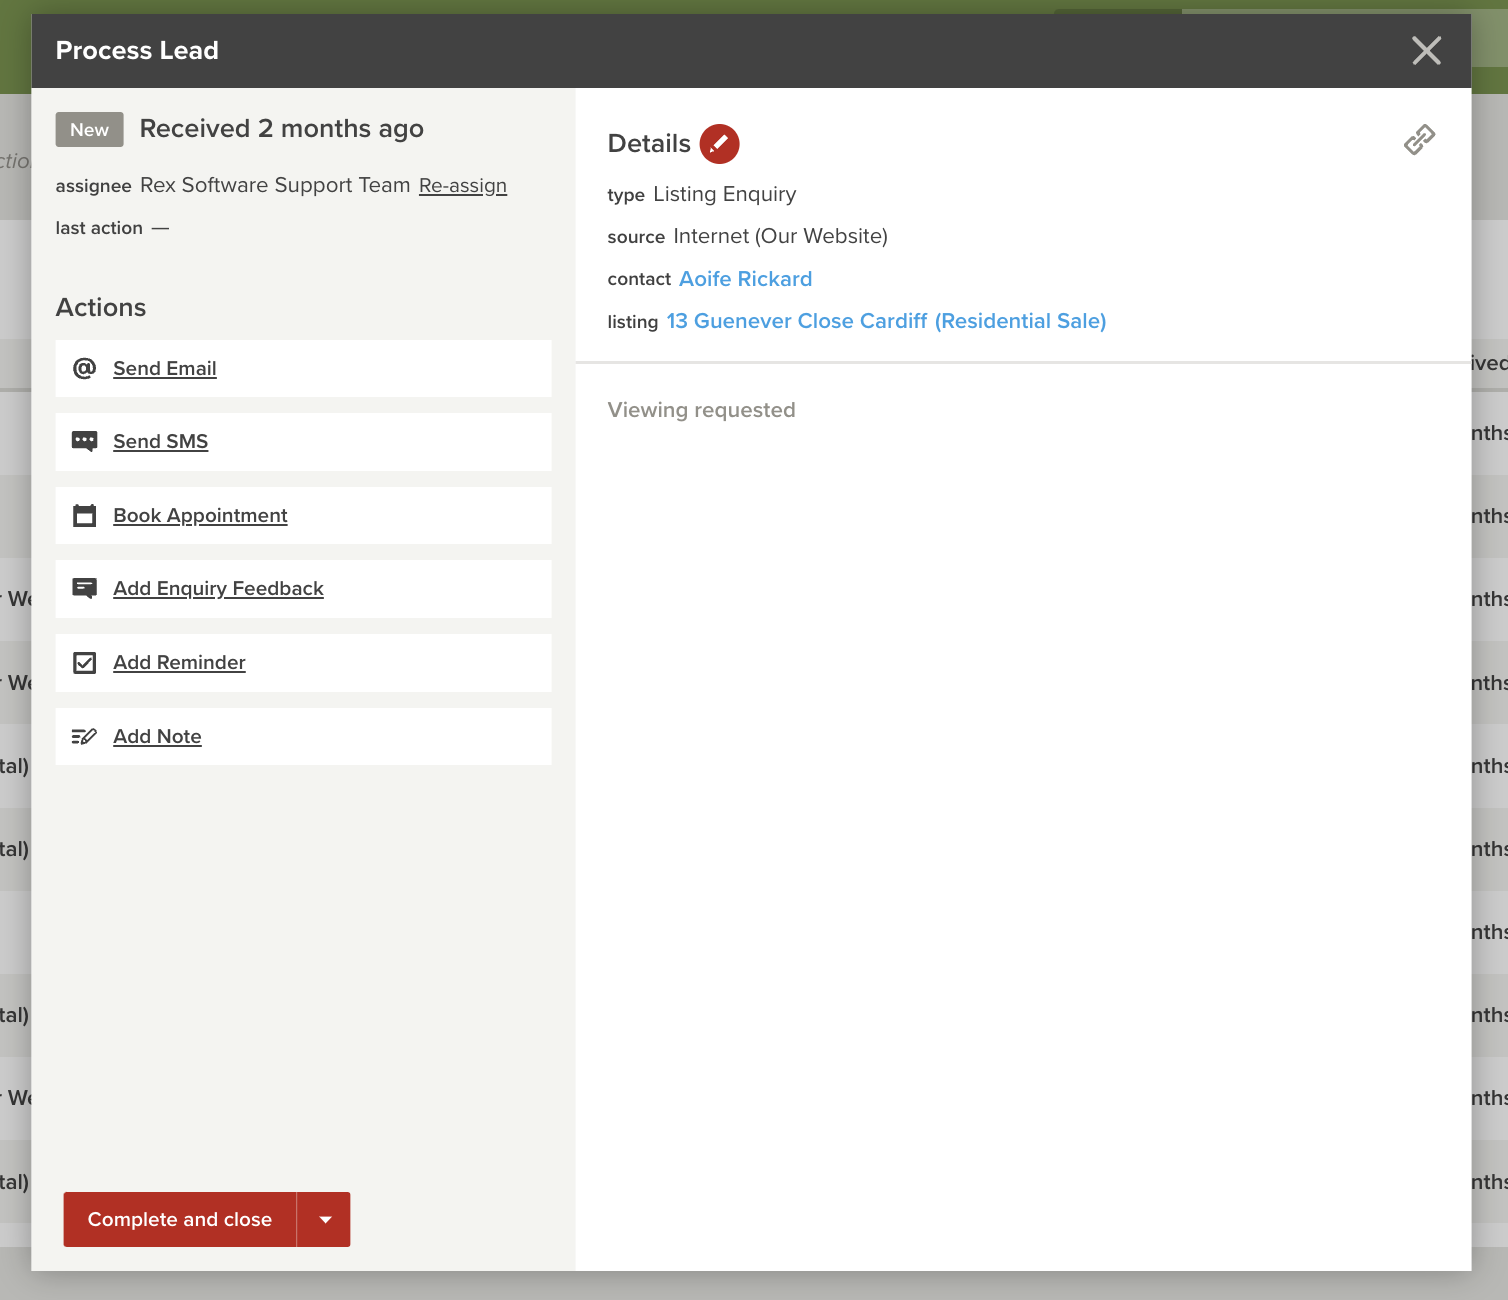
When you select Process Lead from the dropdown menu you'll be presented with a new window.

Completing the Lead from here:
The process lead window shows an overview of the enquiry, and it also shows a few options on how to process the lead itself. You'll notice on the top of the lead that the assignee, contact who made the enquiry, where the lead is from (enquiry source) and listing is linked if Auto-Parsing is enabled.
This will also display the contacts number for easy accessibility - this will display the Primary number if the contact does have a few listed on their record.

Completing the Lead
You'll see the Action options from the left hand side of the lead which includes sending an email or adding feedback.
You also have the option to reassign the lead from here as well by clicking on re-assign and selecting the new agent.If leads have no assignee, the first user who takes an action on the lead (ie send SMS) will automatically be assigned to that lead.
There are a few options that allow you to complete your leads:
- Send Email :Choosing this option will open a new email window, where you can email the contact directly. This will add that email to the contact and listing streams, then mark the lead as completed.
- Book Appointment:This is where you can create an event that will appear in your Rex calendar. You can use this option to set up appointments for inspections, appraisals or general meetings.
- Send SMS :This works similar to theSend Email and Completeoption, but it will send an SMS, and mark the lead as complete. Please note that you must have Marketing Credits to send SMS. For more info, contact the Rex Software Customer Care team.
- Add Reminder:Here you can create reminders that will appear on your dashboard and in the Stream of the contact. You can set up action reminders for sending emails, making a phone call and for general tasks.
- Add Note :Use this option if you have called the contact, or sent an email/SMS outside of Rex to record what you discussed. For more info on adding notes, take a look at the articleRex Concepts: Stream Tab.
- Add Enquiry Feedback:Choose this option to open a new window where you can add feedback relating to this enquiry, then mark the lead as completed.Please Note: If you wish for your enquiry to appear on your vendor report, you will need to add the enquiry as feedback.
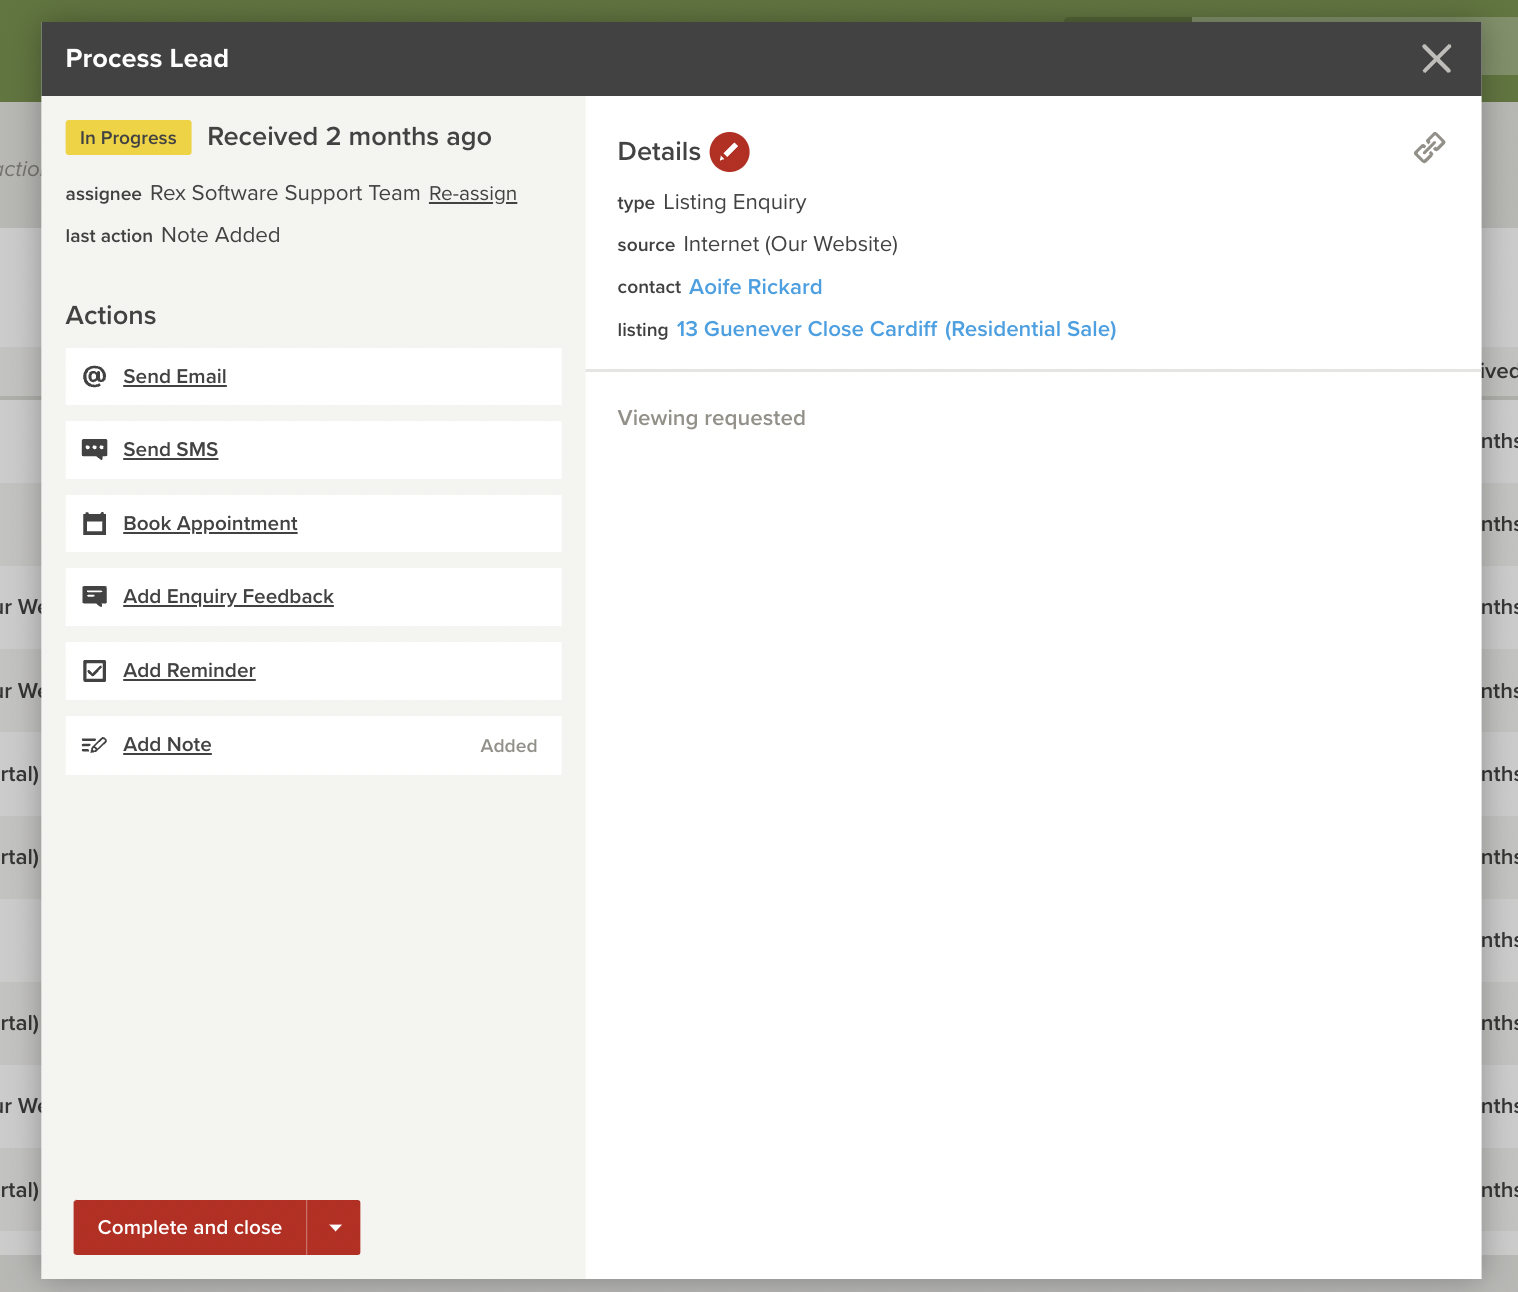
Once you have taken action on the lead, it will then show as In-progress with the last action taken and a note of sent on the relevant action:
