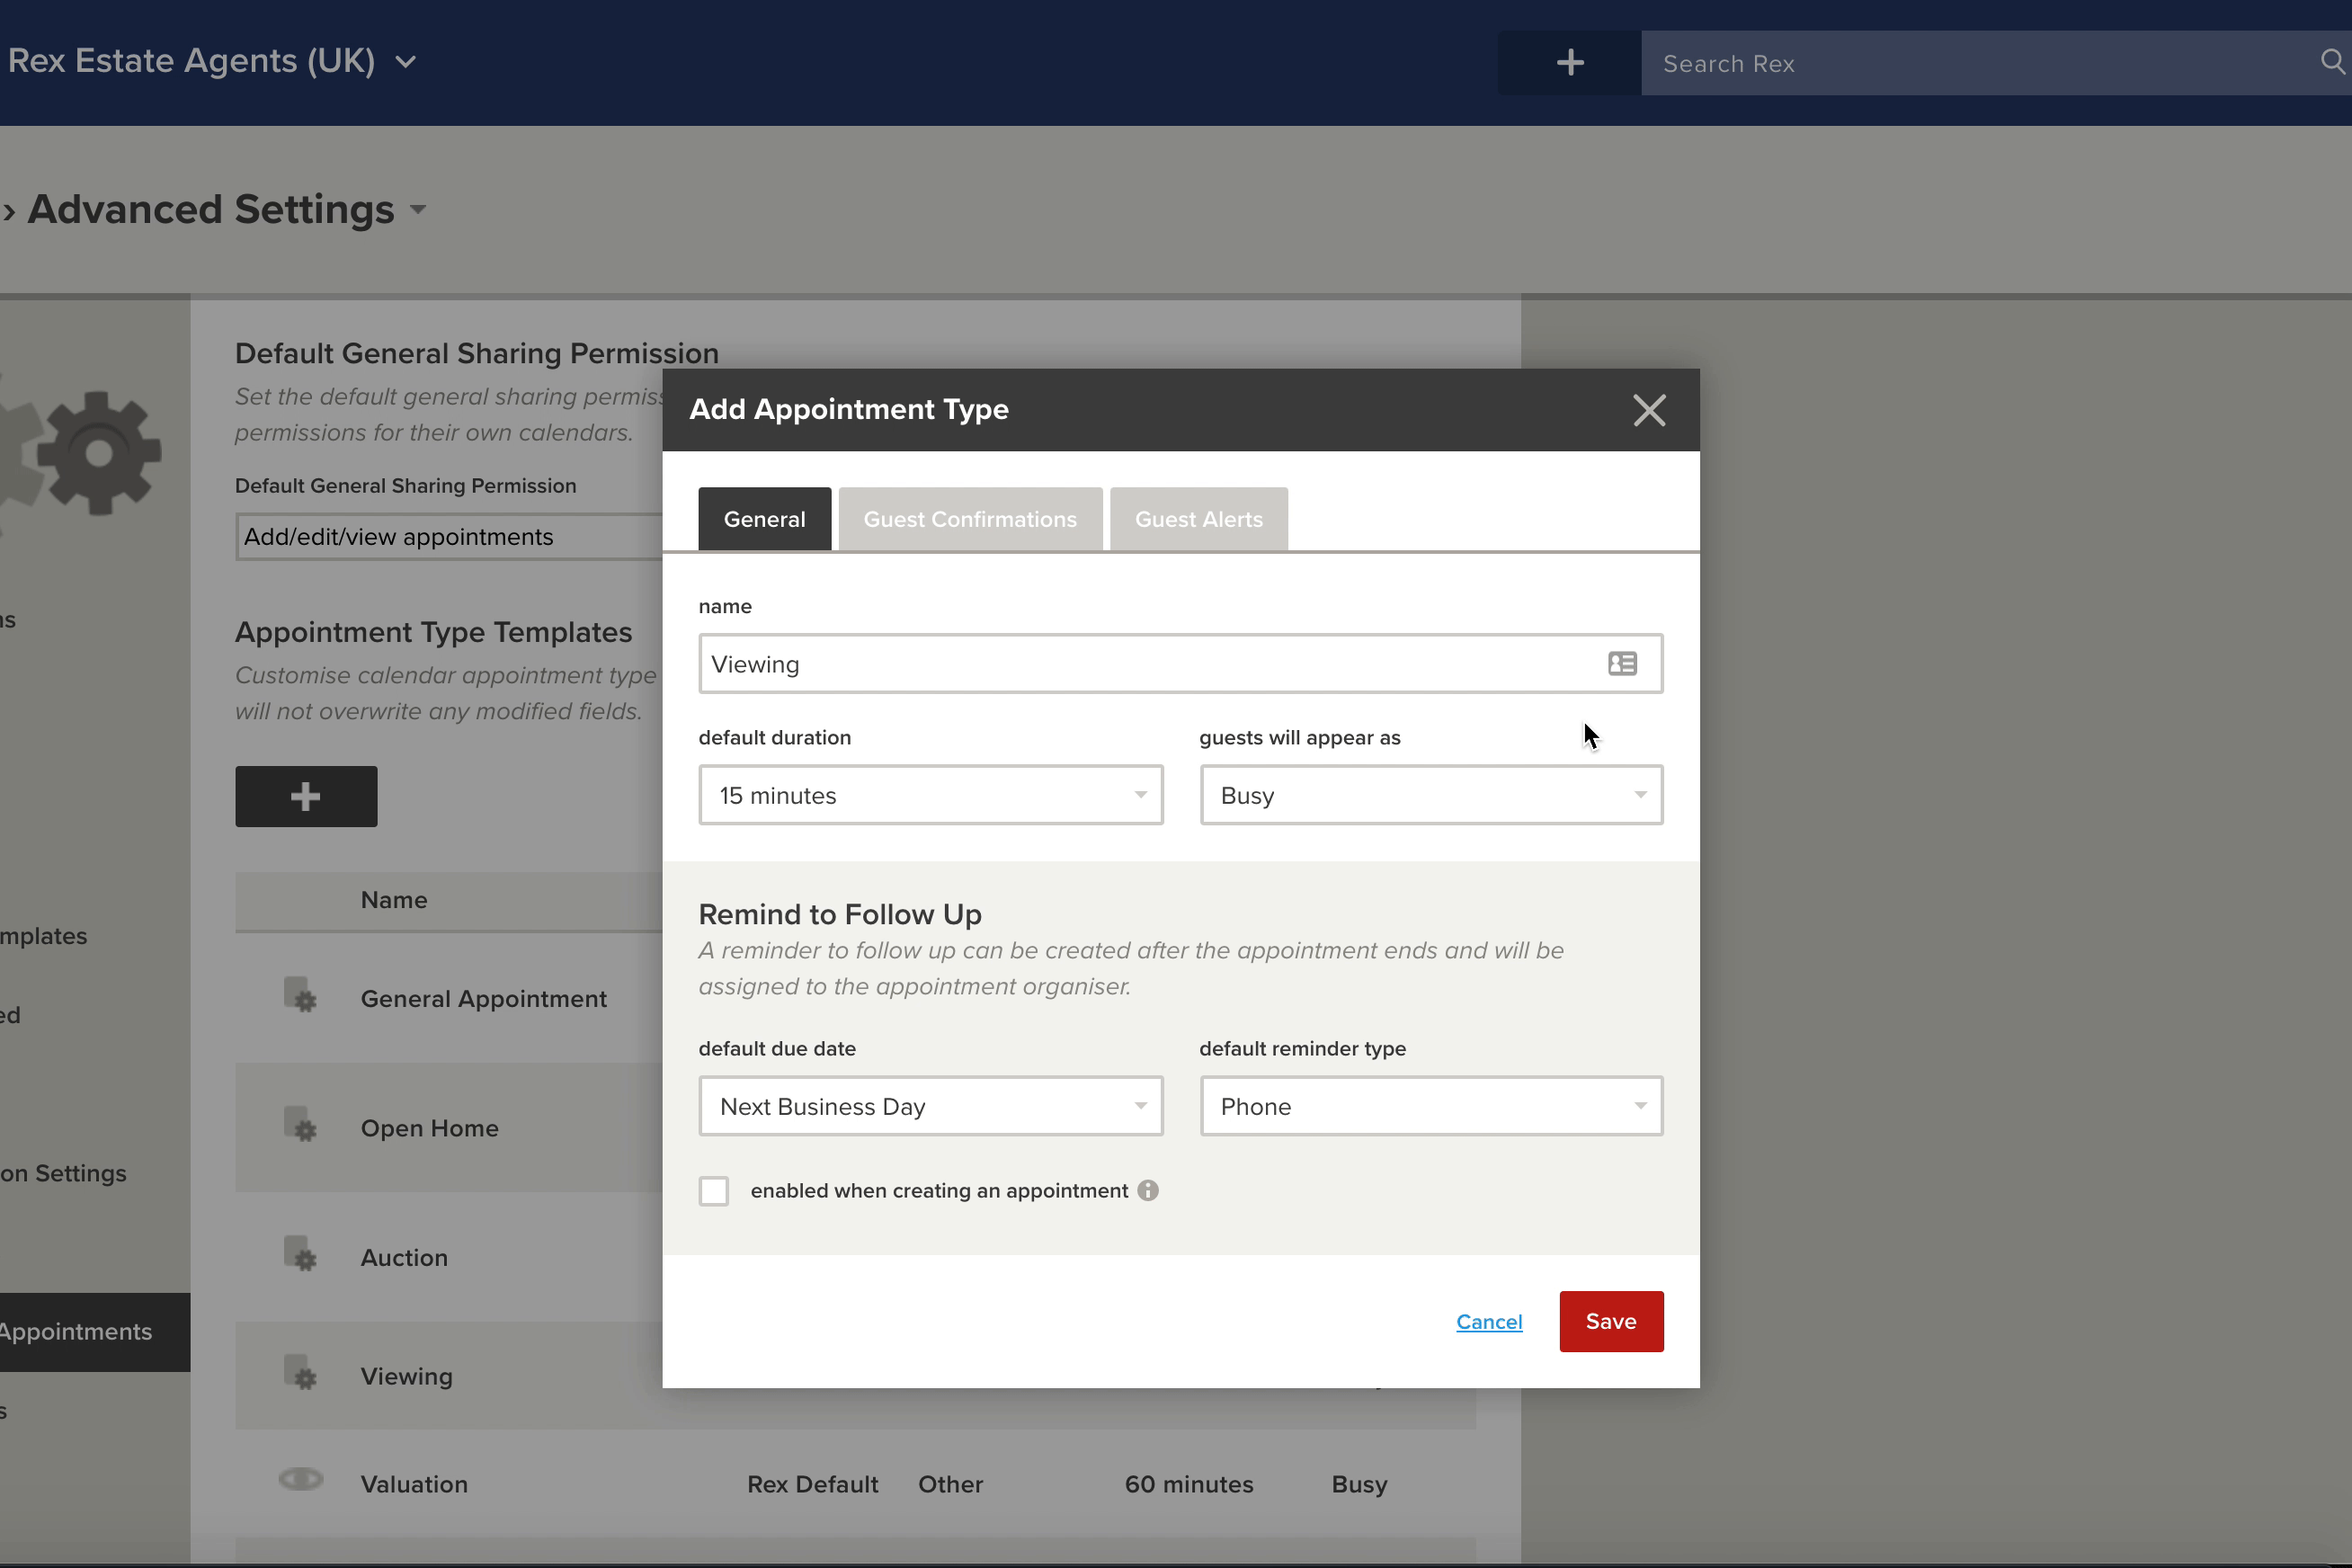
To add your own custom Confirmation messages:
- Go to Settings > Advanced Settings > Calendars & Appointments
- Hover over the Appointment Type that you would like to set up Confirmation Messages on
- Click on the dropdown arrow that appears > select Edit
- Click on the Guest Confirmations Tab
- Choose how you would like to send confirmations from the drop down menu.
The options available are:
- Don’t Send Confirmations
- SMS
- SMS and Email
- Tick the box if you would like to be able to edit confirmations before sending
- Enter a subject
- Edit the Email/SMS Text to include the relevant content. You can also include Merge Tags in the text by clicking on the + next to Add Merge Tag
Please note; Each Category will have a different list of available merge tags. Ie; The Listing (Pricing) category will have tags specific to Pricing on the Listing record, while the Calendar Appointment Details category will have tags specific to the Calendar Appointment. You will need to choose the category accordingly.
We suggest having a run through all the available merge tags and running a test to ensure you have selected the appropriate merge tags.
Important Note: To set up and send a seperate confirmation to your Listing Owner, you will need to choose one of the Viewing categories. E.g Accompanied Viewing.
To set up a default Guest Alert:
- Click on the Guest Alerts tab
- Select + Add Alert
- Choose the type of Alert you would like to send. You can send an Email or SMS. To send both Add a new Alert
- Set the time you would like the Alert to be sent before the appointment, E.g. 1 hour before
- Edit the Email/SMS Text to include the relevant content. You can also include Merge Tags in the text by clicking on the + next to Add Merge Tag
- Click Save