Default General Sharing Permissions
By default, Rex will hide the details of any appointments in your calendar from other users who have permission to access your calendar. You can change the sharing permissions for your calendar to the following:
- View only free/busy (Hide details) - Default. Users can only see if you’re free or busy during appointments.
- View appointment details - Allows other users to view the details of your appointment but not access them.
- Add/edit/view appointments - Allows users to view and make changes to your appointments or add appointments to your calendar on your behalf.
Appointment Type Templates
Sometimes you may need or want to use different Appointment Types to the default Types provided by Rex. For this reason, you can create your own custom Appointment Type Templates, Confirmations and Guest Alerts.
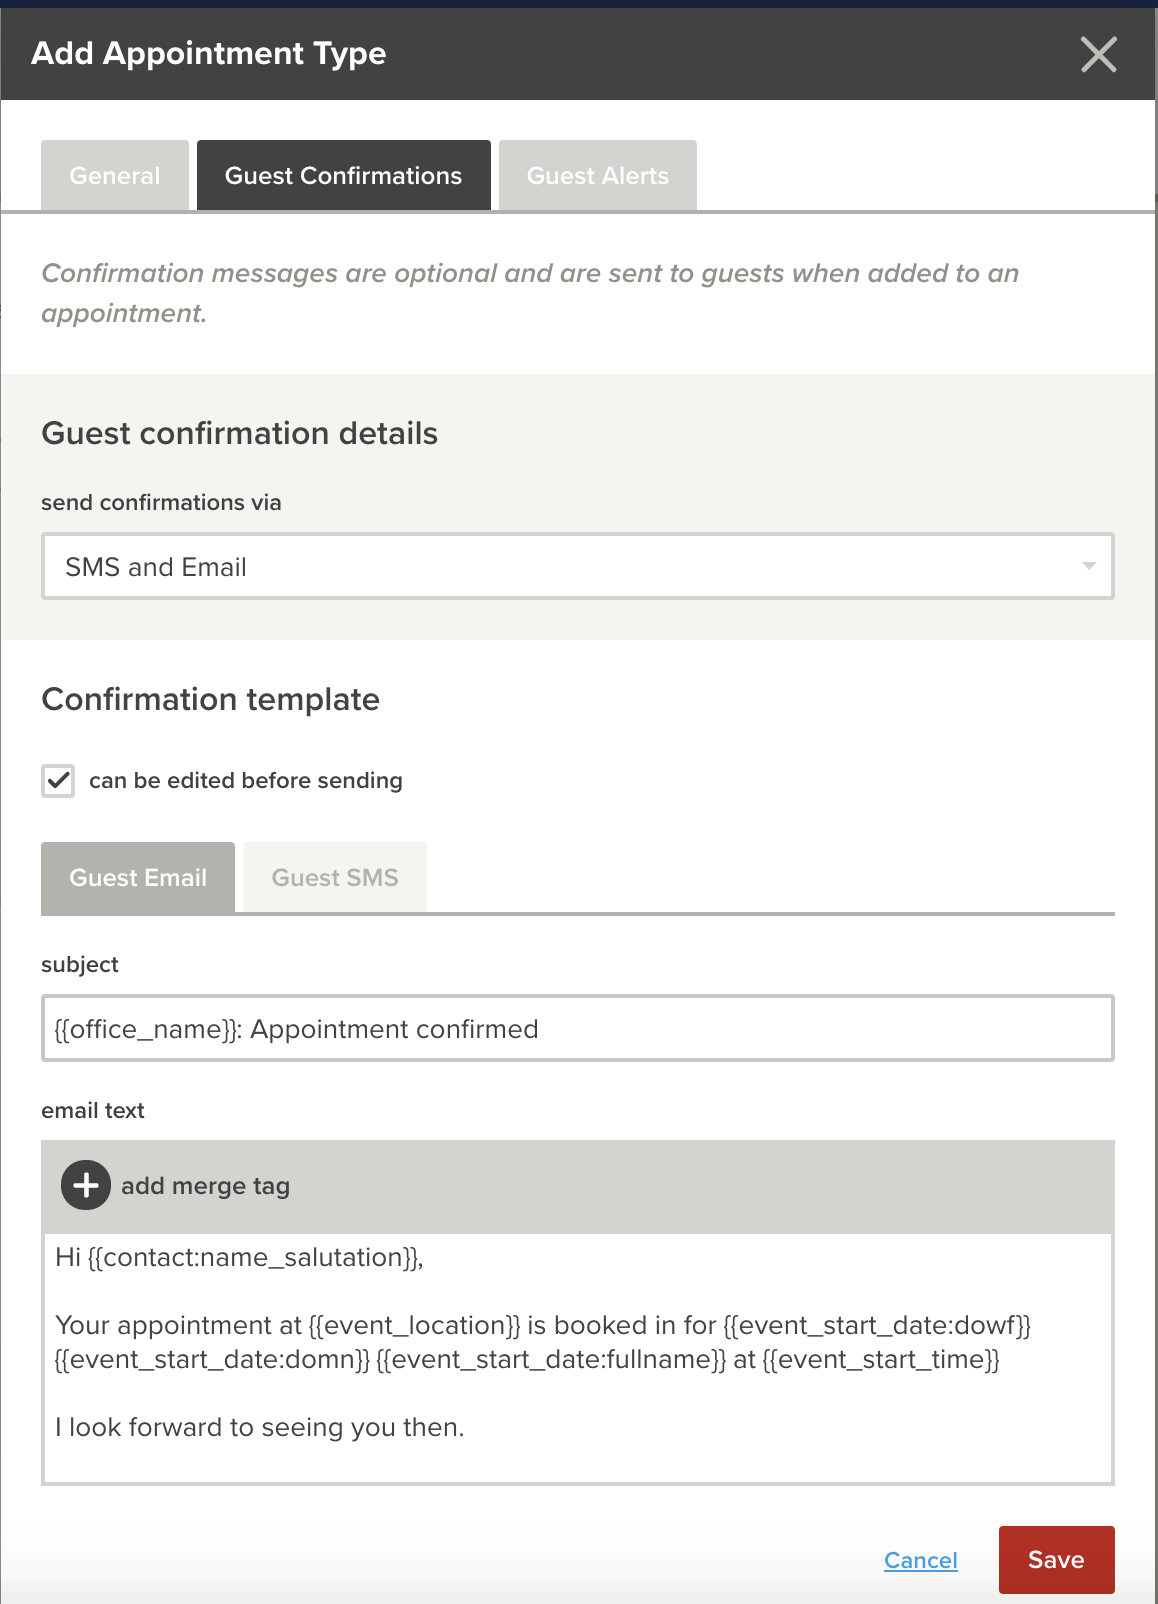
Confirmation messages are optional and are sent to guests when added to an appointment.
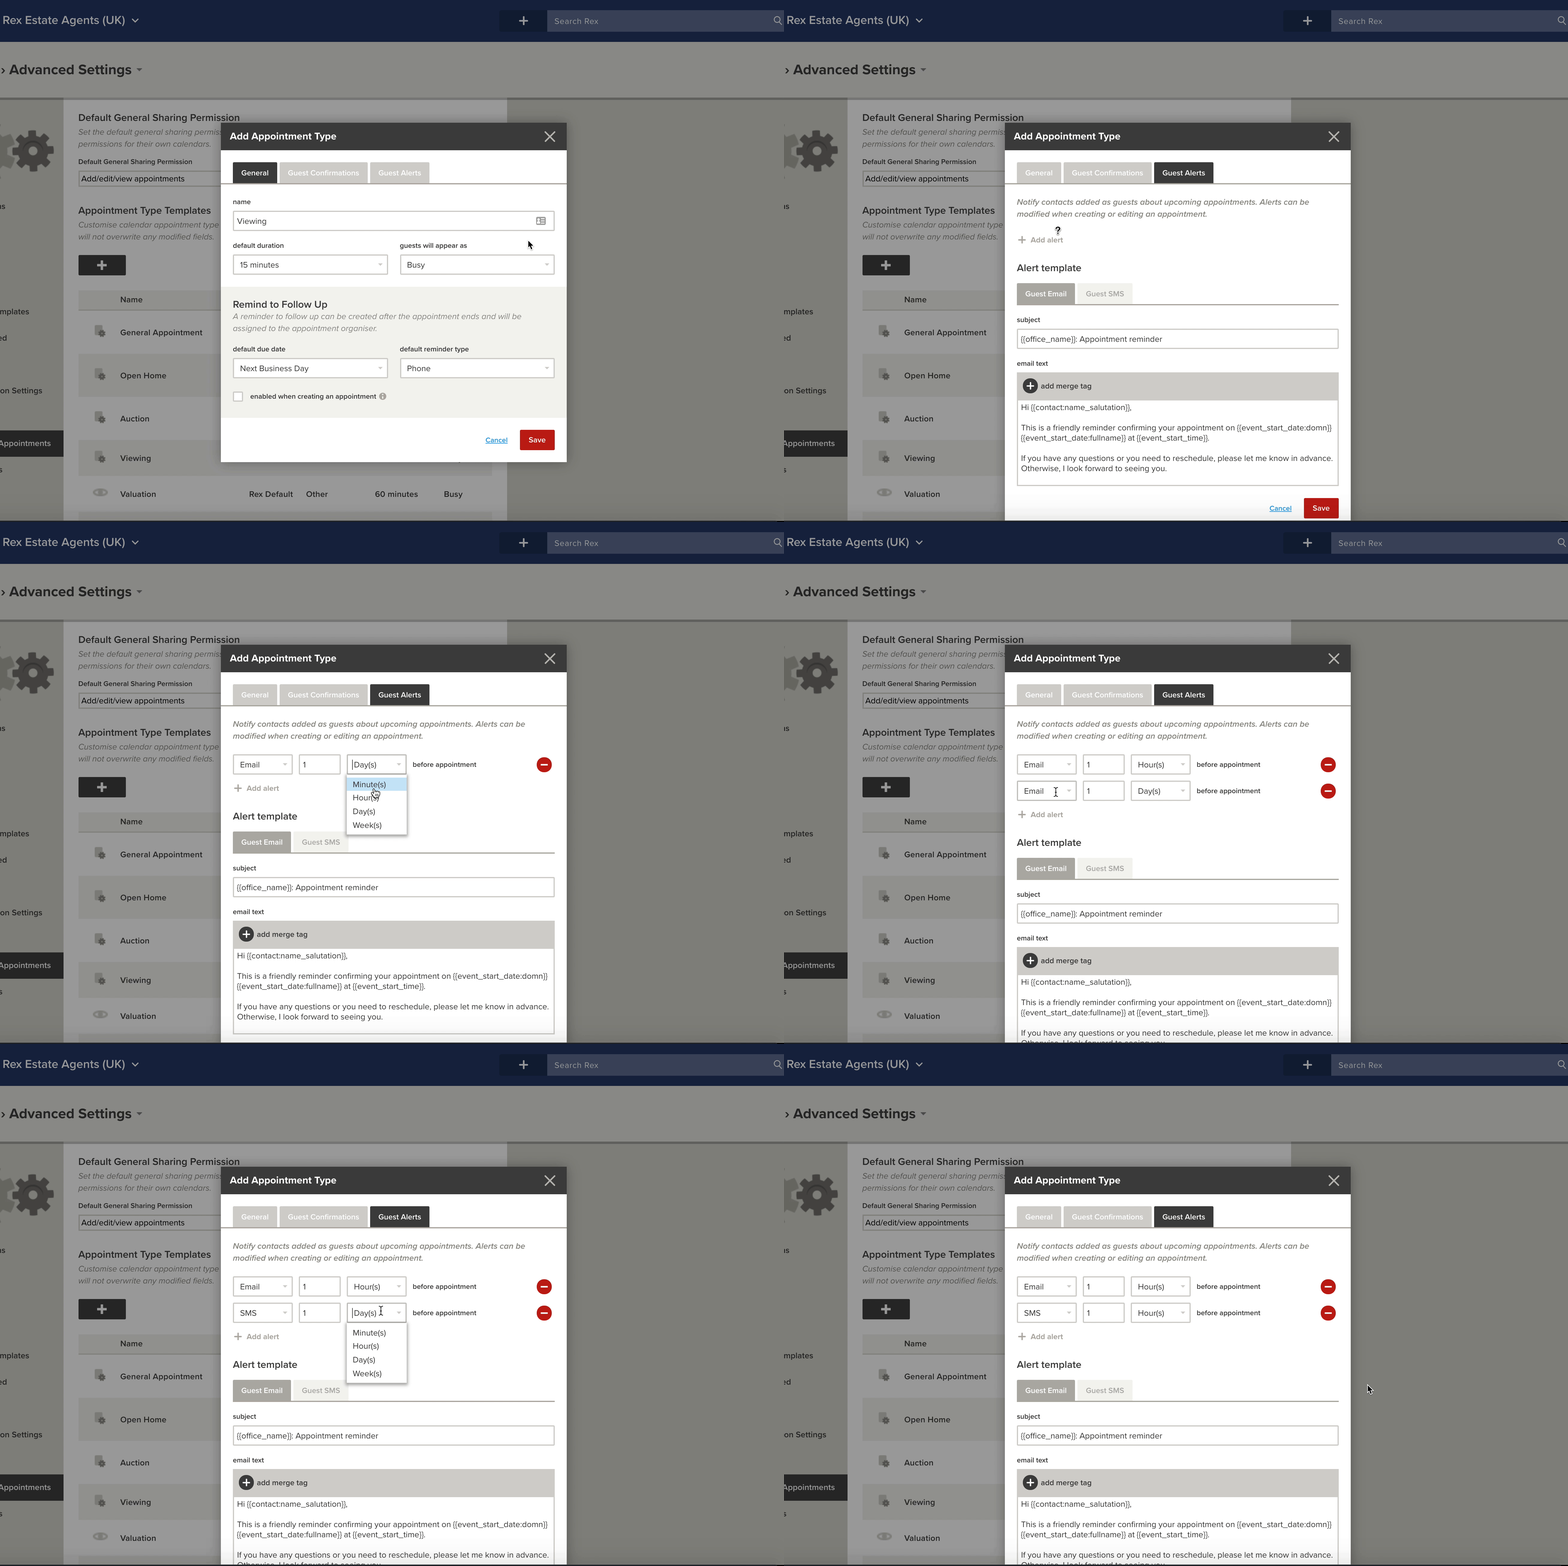
Alerts notify contacts added as guests about upcoming appointments. The Guest alerts can also be modified when creating or editing an appointment.
Please note: You do not need to include your email signature at the end of the confirmation templates. Email confirmations will automatically append the organiser’s email signature.

To add your own custom Appointment type:
- From Advanced Settings, go to Calendars & Appointments
- Click on the Plus icon in the top left corner
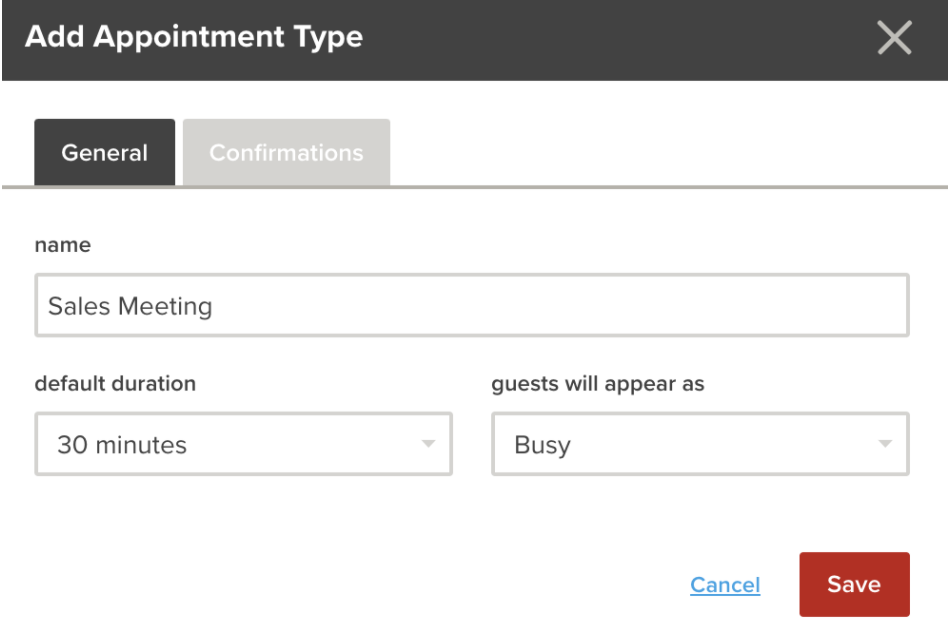
- Enter your Appointment Name E.g. Sales Meeting
- Set the Default Duration E.g. 30 minutes
- Choose whether your Guests will appear Free or Busy by default
- Click Save or to add a Confirmation message, select Confirmations at the top
To add your own custom Confirmation message:
- Click on Confirmations
- Choose how you would like to send confirmations from the drop down menu.
The options available are:
- Don’t Send Confirmations
- SMS
- SMS and Email

- Tick the box if you would like to be able to edit confirmations before sending
- Enter a subject
- Edit the Email/SMS Text to include the relevant content. You can also include Merge Tags in the text by clicking on the + next to Add Merge Tag
Please note; Each Category will have a different list of available merge tags. Ie; The Listing (Pricing) category will have tags specific to Pricing on the Listing record, while the Calendar Appointment Details category will have tags specific to the Calendar Appointment. You will need to choose the category accordingly.
We suggest having a run through all the available merge tags and running a test to ensure you have selected the appropriate merge tags.
To set up a default Guest Alert:
- Click on the Guest Alerts tab
- Select + Add Alert
- Choose the type of Alert you would like to send. You can send an Email or SMS. To send both Add a new Alert
- Set the time you would like the Alert to be sent before the appointment, E.g. 1 hour before
- Edit the Email/SMS Text to include the relevant content. You can also include Merge Tags in the text by clicking on the + next to Add Merge Tag
- Click Save
