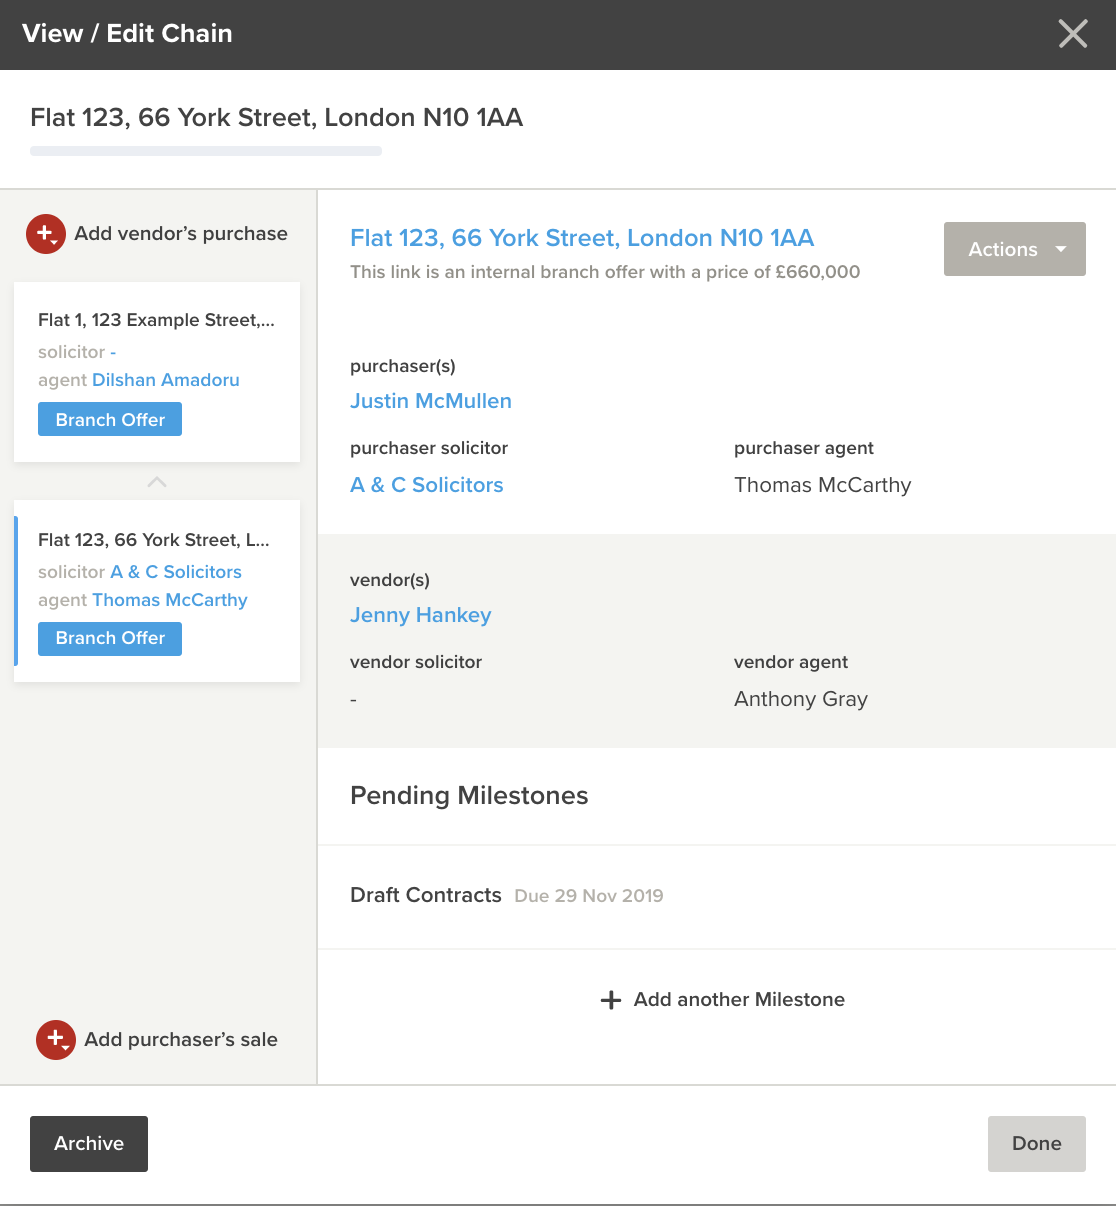
Once you're viewing the chain, you can go ahead and start to modify it - the window is split up into a few key areas:
- On the left you have the sales/offers and can add vendor and purchasers sales - this is how you can add additional links to the chain
- On the right you have more details about the selected Link in the chain - to change the selected link, just select it on the left
- On the right you have the Notes - this is where you can attach any sales progression notes relevant to the link you have selected
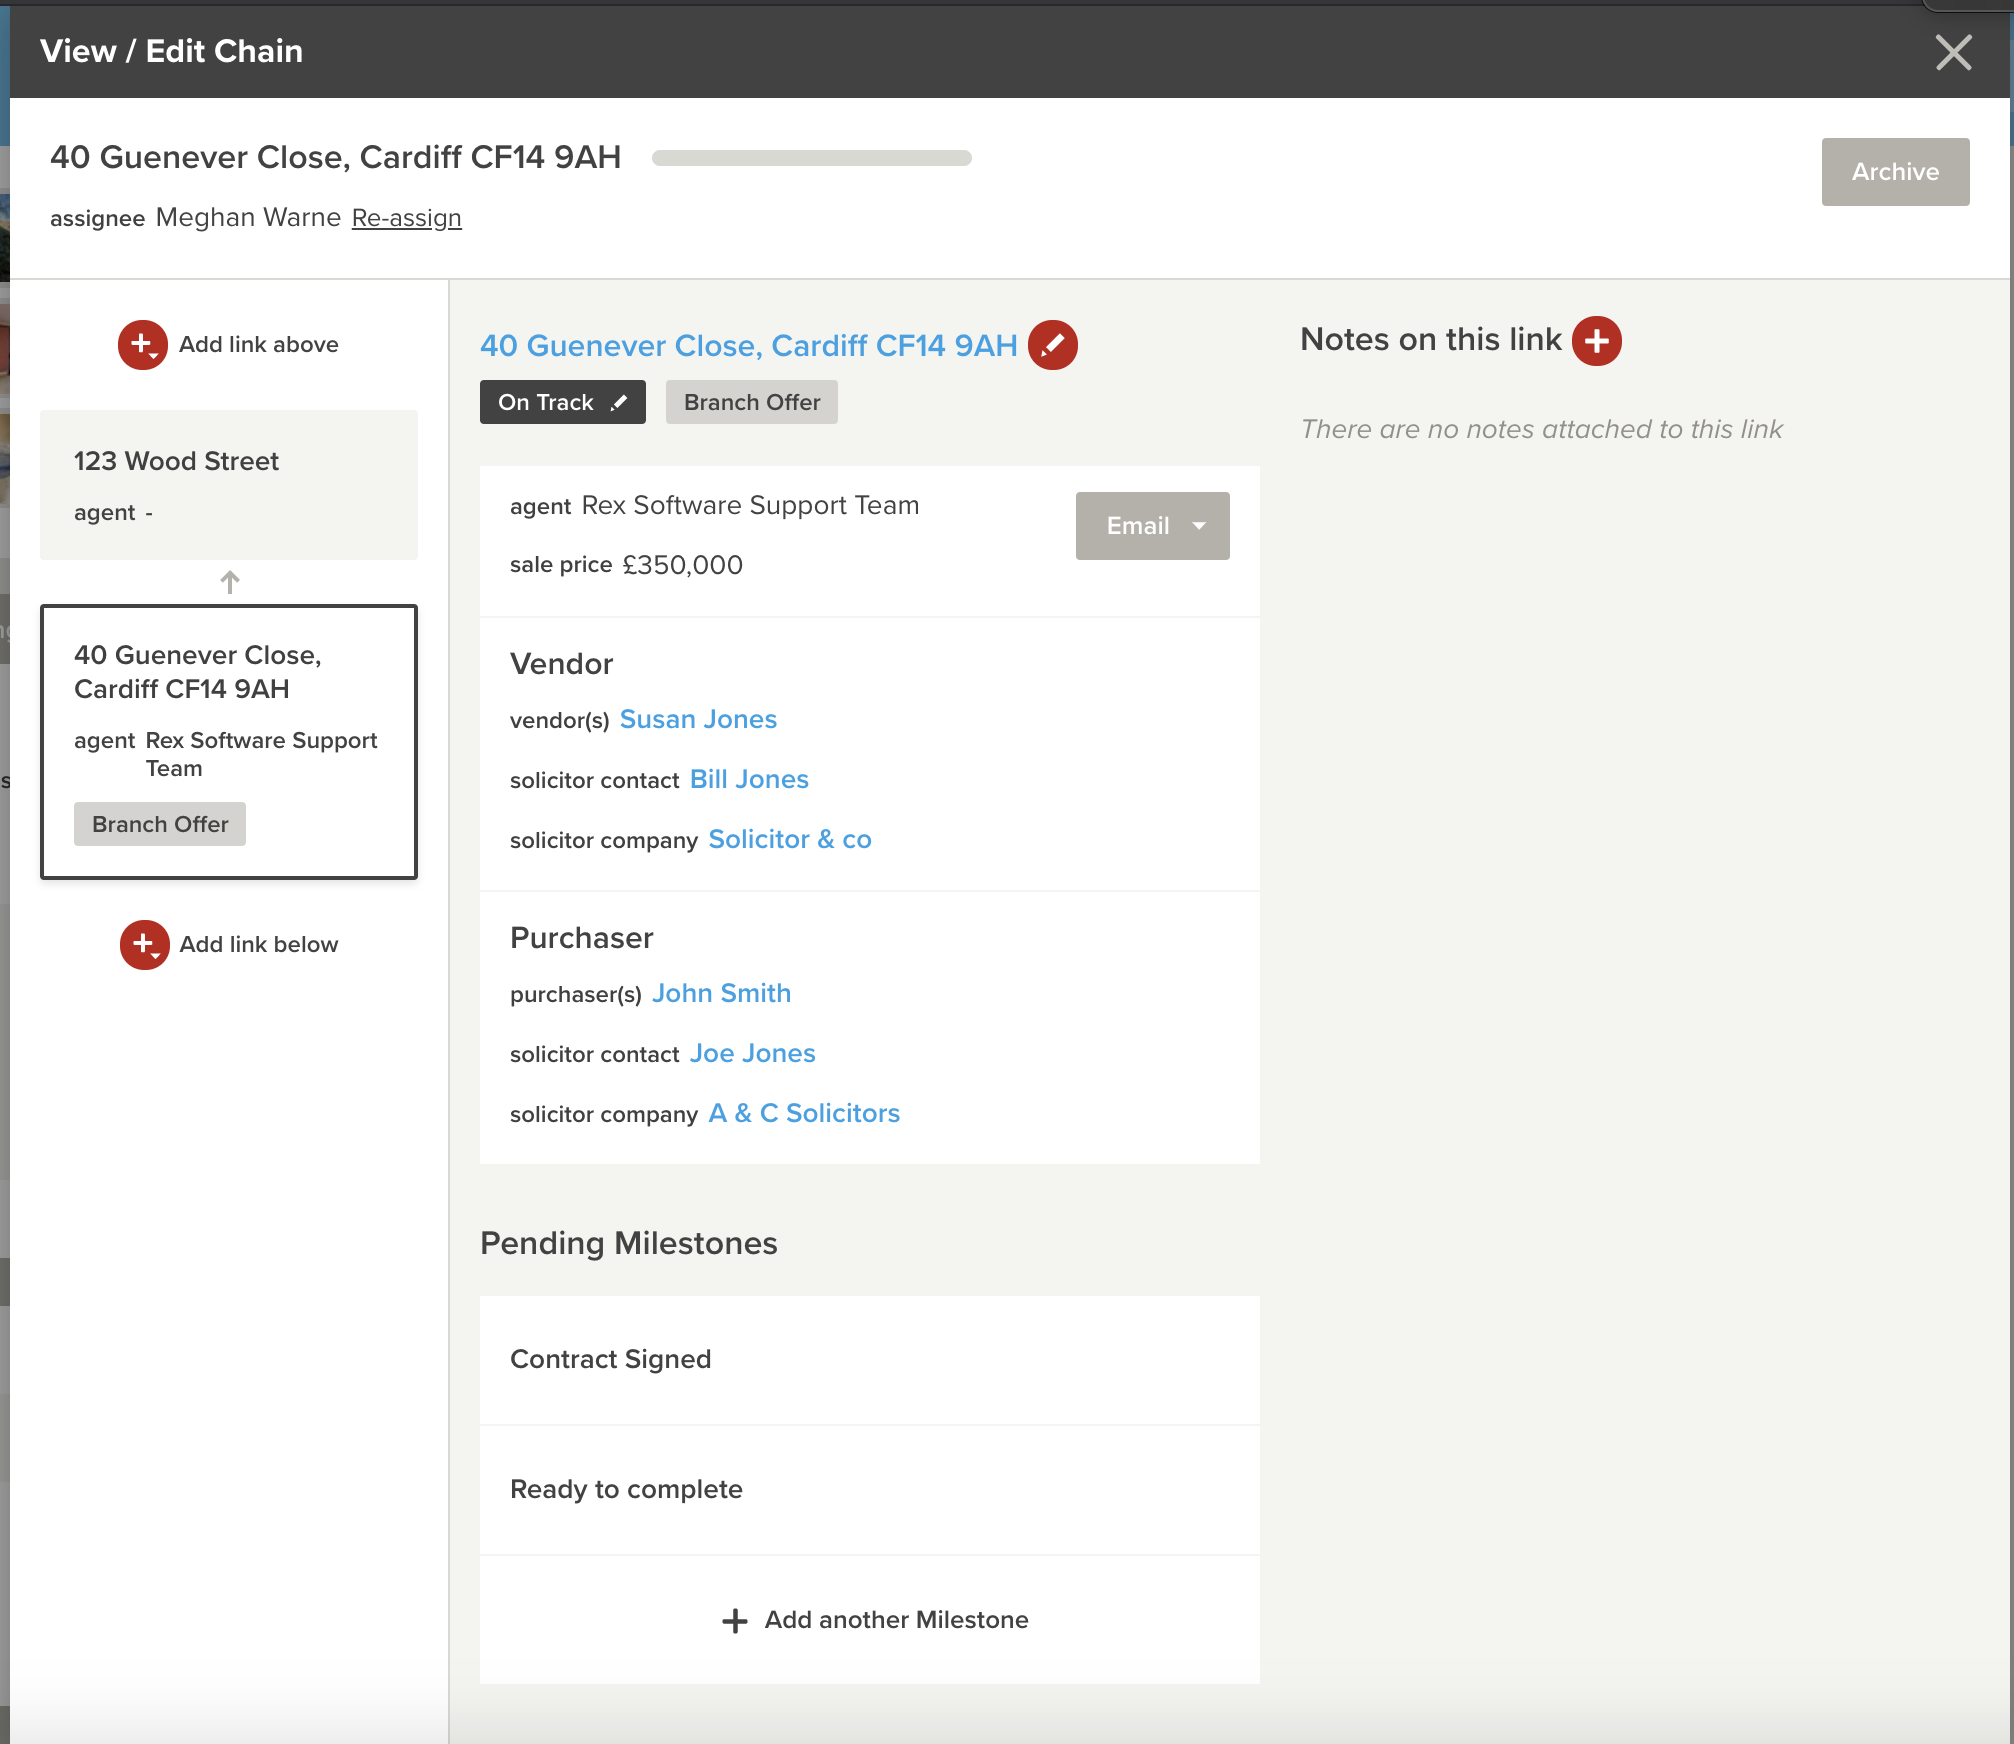
Assigning a Chain
By default, chains are assigned to the user it was created by. Once an offer has been agreed, the sale may need to be ‘handed over’ to the Sales Progressor.
To re-assign a Chain:
- Once you're viewing the chain click the Re-assign button at the top of the window
- Choose the user you would like to be the chain assignee. If you assigning to yourself, click Assign to Me
-
Click Save

Adding Links/Splits to a Chain
If you need to add additional links to your chain - for example, the progression of your vendor's chain - you can do so by using either the Add link above or Add link below. This both work in the same way:
- Click Add link above or Add link below
- Choose either Link or Split (split is used when there are two parties involved in the purchase or Sale - say if it's a couple separating and selling their property)
- If the sale or purchase is one of your branches sales, tick the box
- Fill in the details of the sale/purchase
- Once you're finished, click Save
Viewing and Editing a Link
If you select a link on the left, you then get a detailed view of it on the right - there are a few things we can do here:
- Pending Milestones - at the bottom, you can add milestones to track the progress of the selected sale. Just click Add milestone, then enter the details. Once the milestone has been completed, click on it in the list, then tick the box for completed and enter the date it was completed.
- Actions - clicking this in the top right-hand corner, gives you several options:
- View / Edit - to update the details of the link
- Mark as end of chain - use this to mark the end of the chain
- Mark as start of chain - Use this to mark the beginning of the chain
- Archive - once the sale has been completed, or has fallen, you can click on Archive in the bottom right-hand corner. From there, choose a reason, then click Archive.