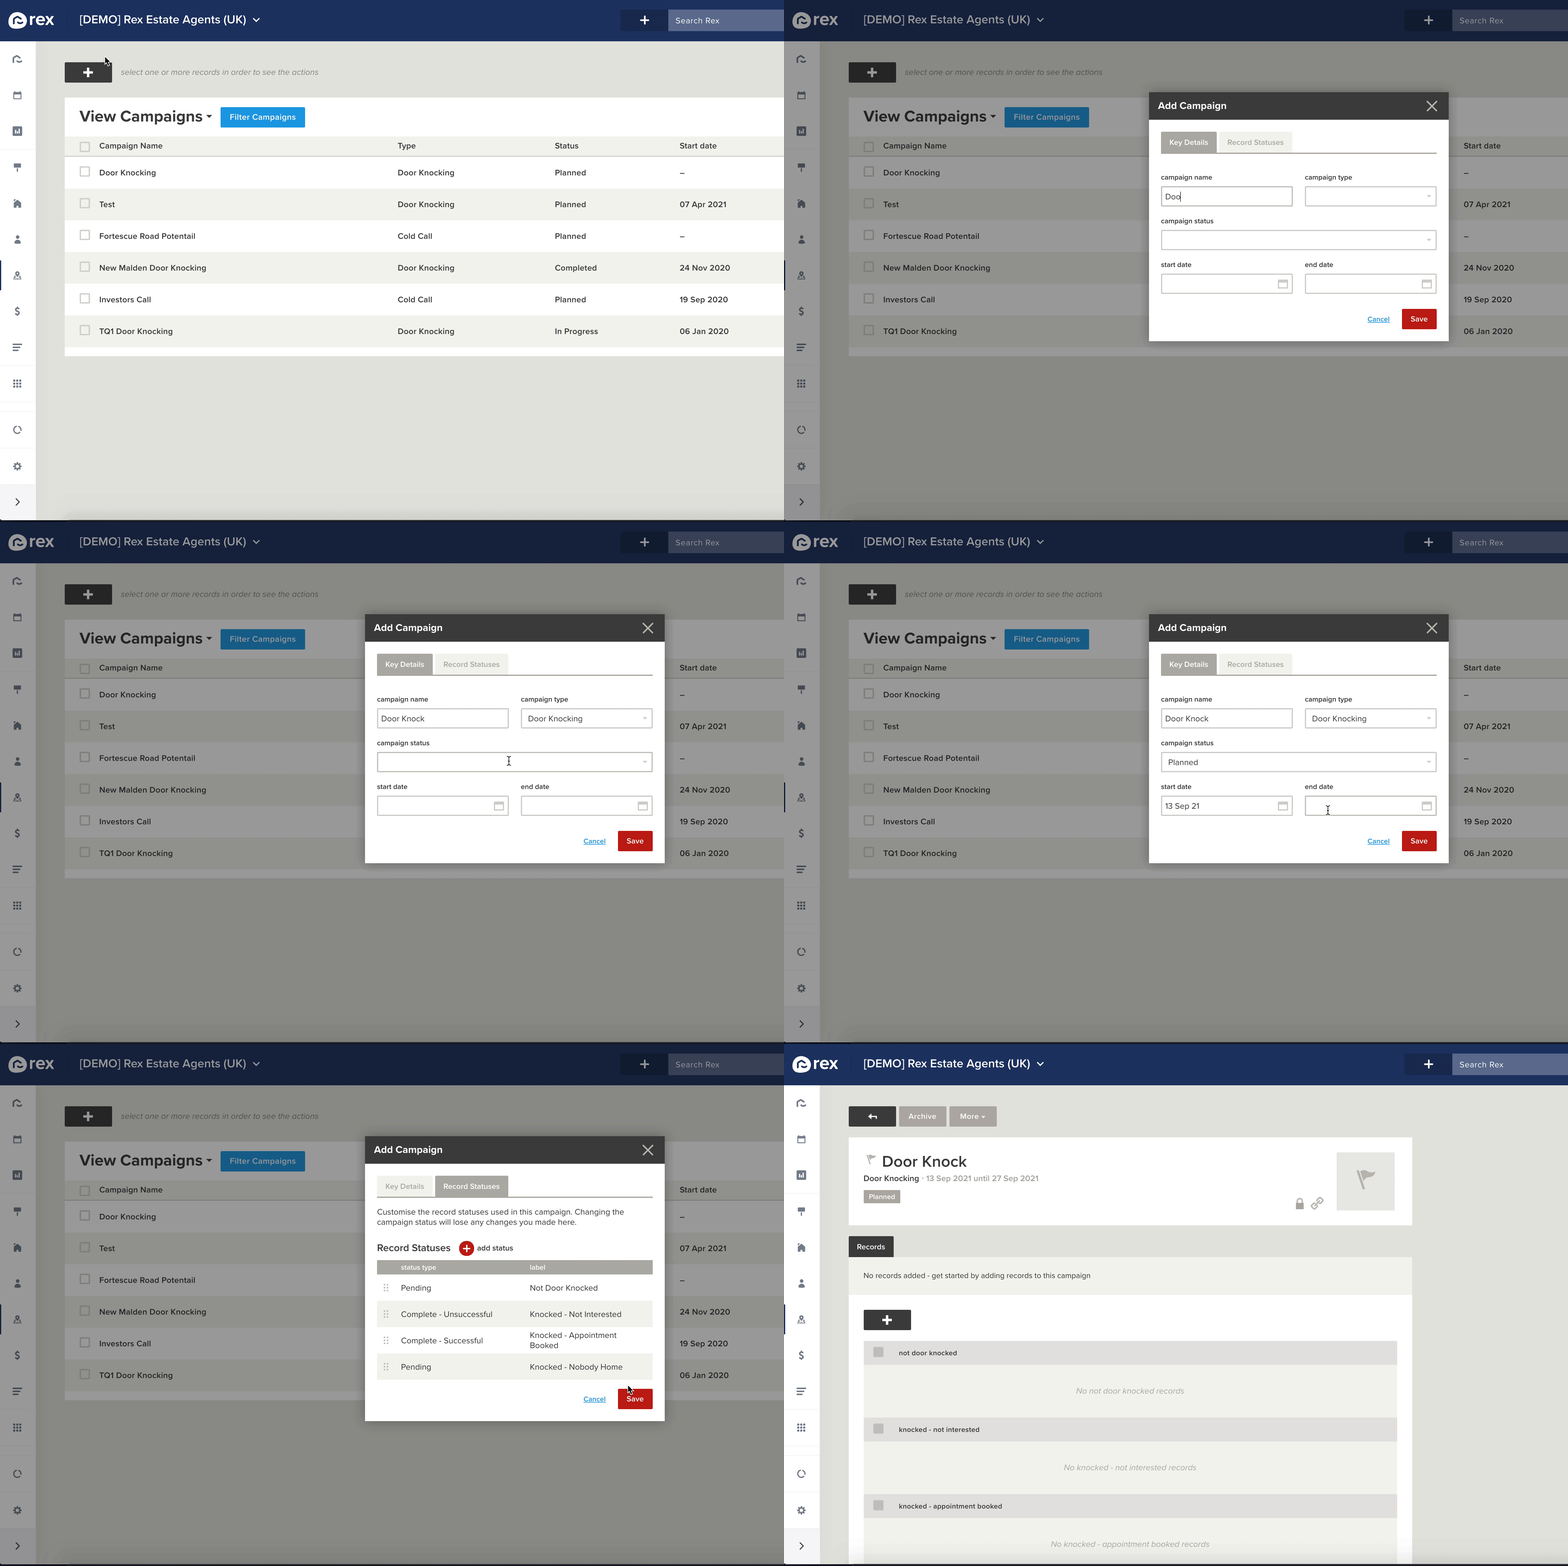
Adding a Campaign can be done by following the below steps:
- Select the 'Leads' option from the left side menu
- Select 'All Campaigns' under the 'Campaigns' section
- Select the 'Plus' icon in the top left-hand corner
The 'Add Campaign' dialogue is split into two sections:
- Key Details
- Record Statuses
Key Details
Here, you can add the basic details of your Campaign. You'll need to specify;
- The Campaign name
- The Campaign type - Phone, Doorknocking
- The Campaign status - whether it's being planned, currently in progress, or if it's already been completed or aborted
- The Campaign start and end dates
Record Statuses
A Campaign has a set of statuses that related records move through as they progress through the campaign. You can configure a default set of statuses for each campaign type, or this can be customised at a per-campaign level.
For example: if you were creating a new type of calling campaign, you might create statuses to represent various different call outcomes, such as "Spoken to", "Wrong number", or "Do not call again"
When setting up new statuses you can set the following:
- Base type - this determines the type of status IE. whether it's pending or complete (and the type of completion). As an example: if your calling Campaign was for canvassing potential new vendors, and you wanted to have a custom "Valuation Booked" status, you would select "Complete - Successful" as the base type for that status.
- Label - the name of the status
Click the Red 'plus' button to add a new status, and click 'Save' when you're done.
