Adding Custom Tabs allows for custom and unique data to be filed under record types in its own tab or existing tabs. If you’re creating a new tab, a tab becomes available under the drop-down arrow next to the legal tab in Listings and Projects, and beside the documents tab in Properties and Contacts. If you’re adding a new group to a default Rex tab, you will see this field appear on the record type after it has been added.
To start the process for creating a new custom tab or field:
- From the left side menu go to Settings > Under Customisations, go to Custom Fields & Tabs
- In the left-hand menu, choose the type of tabs you would like to work with:
- Contact Tabs - for contacts only
- Property Tabs - for properties and listings
- Listing Tabs - for listings only
- Project Tabs - for projects only
- Project Stage Tabs - for project stages only
- Contract Tabs - for contracts only
- Agency Tabs - for agency settings only
- Location Tabs - for each location settings
- User Tab - for user settings
All Tabs types will follow the same process to create.
System Tabs
System Tabs refer to any Rex Default tabs that are available on your records. For example, Listing Records have default tabs such as Key Details, More Info, Marketing, Events, Documents and Legal. Rex provides you with an option to create a custom group inside those tabs.
Before we get started, it's import to understand how the groups and fields work. Think of a group as a container for fields you want to group together - for example, you might have a group for 'Contact Details', then another one for 'Marketing Info'. Once you have some content in your fields, you can then rearrange them in that group. If you have more than one containers, you can rearrange how they're stacked.
To create a group within a tab:
- Open the tab you’d like to add your custom field (eg Key Details)
- Select Add Group
- Enter the name of the group and select Done
- Hover over the group you’ve added and select Add Field
- Select the Field Type
- Add the title and select save
To change the position of your group within the tab, hover over the group you’ve created and click the Up or Down arrow until you’re happy with the position.
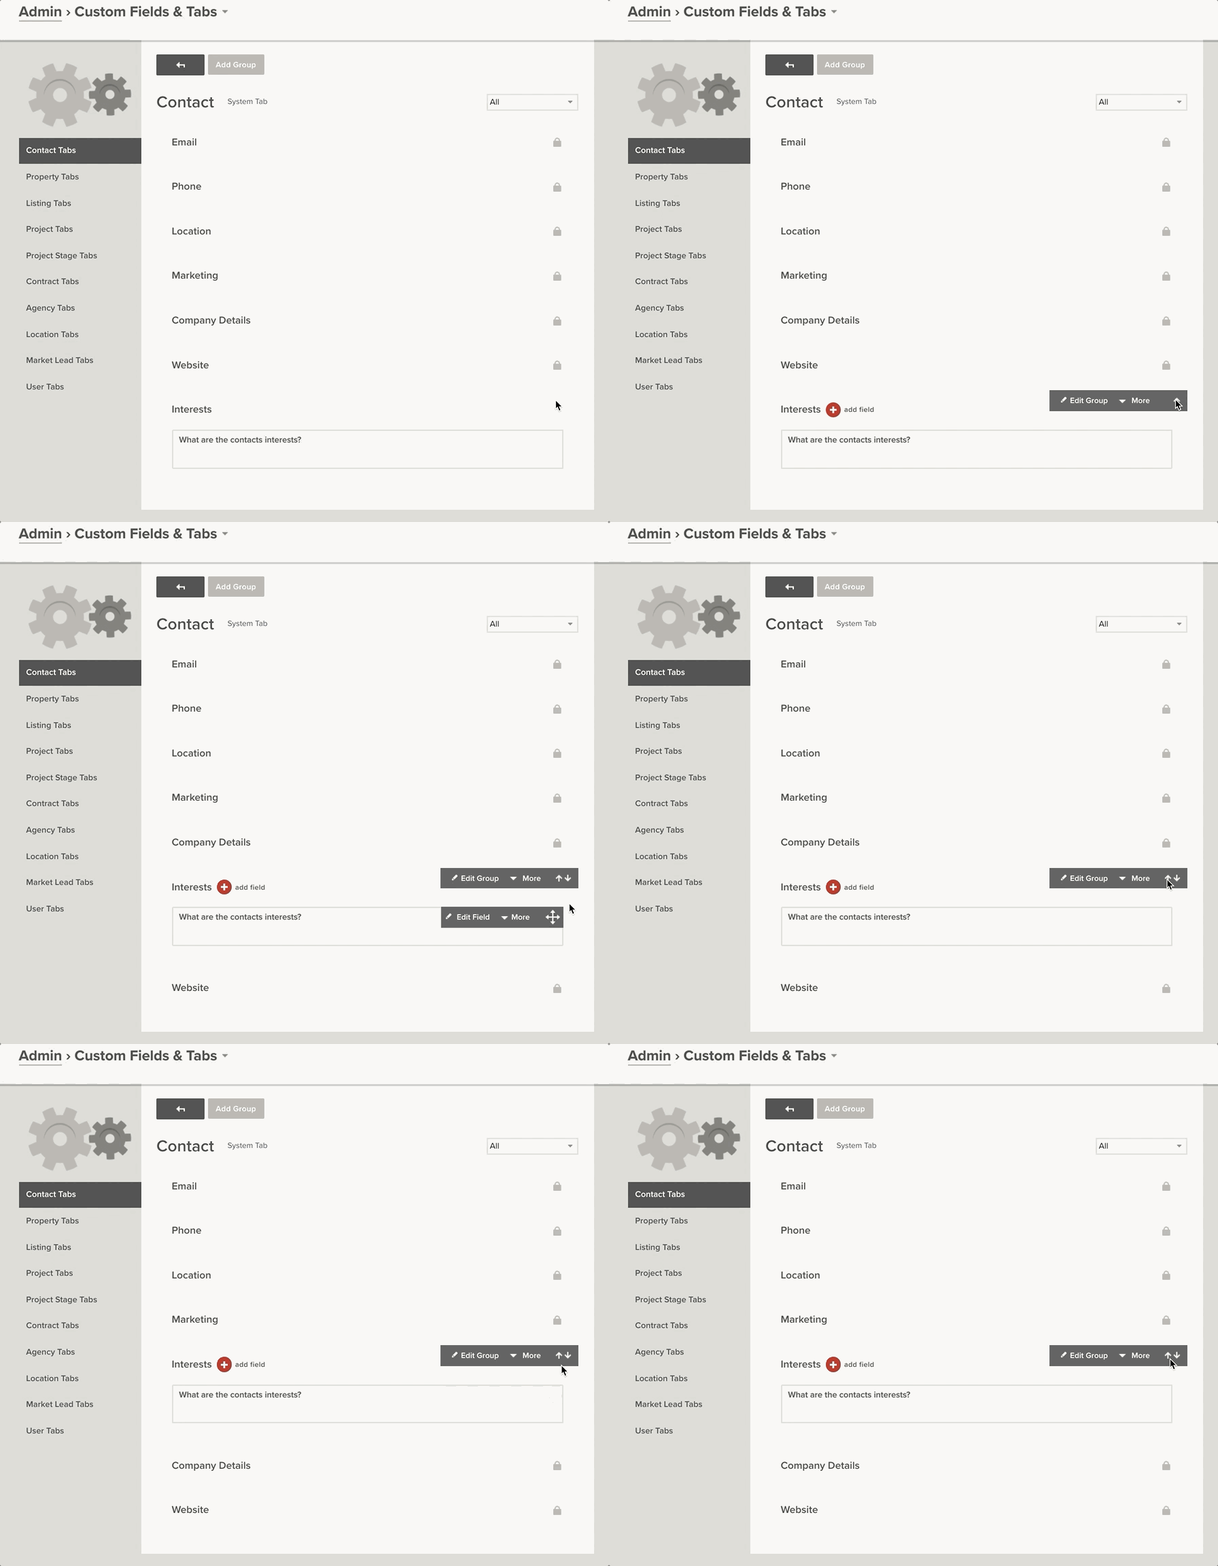
Once you are finished with your group, you need to reload Rex to see the changes - Click on your initials in the top right-hand corner of Rex then choose Reload.
Custom Tabs
To create your own custom tabs:
- Select Add Tab
- Type the name of the tab and select Done
- Click on the tab
- You should now be shown a new window to work in. Along the top you'll have several options:
- Back button - takes you back to your list of tabs
- Edit Tab Name - lets you rename the tab - you can also delete the tab from here
- Add Group - this lets us add a group to the tab and is how we build the tab - see the next section for more info
- Restrict Access - use this option to restrict which users can use this tab
Once you're ready to start adding content to your tab, you'll need to:
- Click Add Group
- Give it a name
- Click Done
Now that you have a group, you can hover over it for a few options:
- Add Field - We use this to add in our custom fields - this will be covered below
- Edit Group - Clicking this will let us change the name of the group, and add some help text. The help text will give your users more info on what the group is used for.
- More - Clicking this gives us two options:
- Move - use this to move the group to another tab
- Delete - deletes the group from the tab
- Move Up/Down - if you have more than one group, you'll see an either an arrow up or down. Clicking will move the group around the other groups.
Now that we have a group, we can go ahead and start to add fields. To get started:
- Hover over the group
- Click Add Field
- Choose the Type:
- Text Area - intended for large blocks of text or ongoing lists/registers
- Text Box - allows a smaller amount of text - usually one sentence
- Select Box - choose from several pre-designated options from a drop-down arrow. If you choose this option, you'll see that it brings up 'Values'. This is where you add the options you would like your users to choose
- Check Box - create a single toggle-able check-box
- Enter a title for the field
- Click Save
Editing Fields
Once you have a field, you have similar options to the group. Hovering over it, will reveal:
- Edit Group - Clicking this will let us change the name of the field. You can also delete the field by clicking Remove. Note - you can't change the field once you've created it. If you need to change, you'll need to delete, then re-add.
- More - Clicking this gives us three options:
- Move - use this to move the group to another tab and group
- Delete - deletes the group from the tab
- Duplicate - use this to make an exact copy of that field
- Move Cursor - Click and drag the field to a new location in the group
Repeat the steps above to add more fields and groups as needed. Once you are finished with your Tab, you need to reload Rex to see the changes - Hover over Hi (Username) then choose Reload.
For Custom Tabs, you can add as many groups and fields inside of those groups as you wish.
Rearranging Tabs
Once they've been created in the admin area, Custom Tabs are stored in an action menu to the right of the system tabs on a record view.
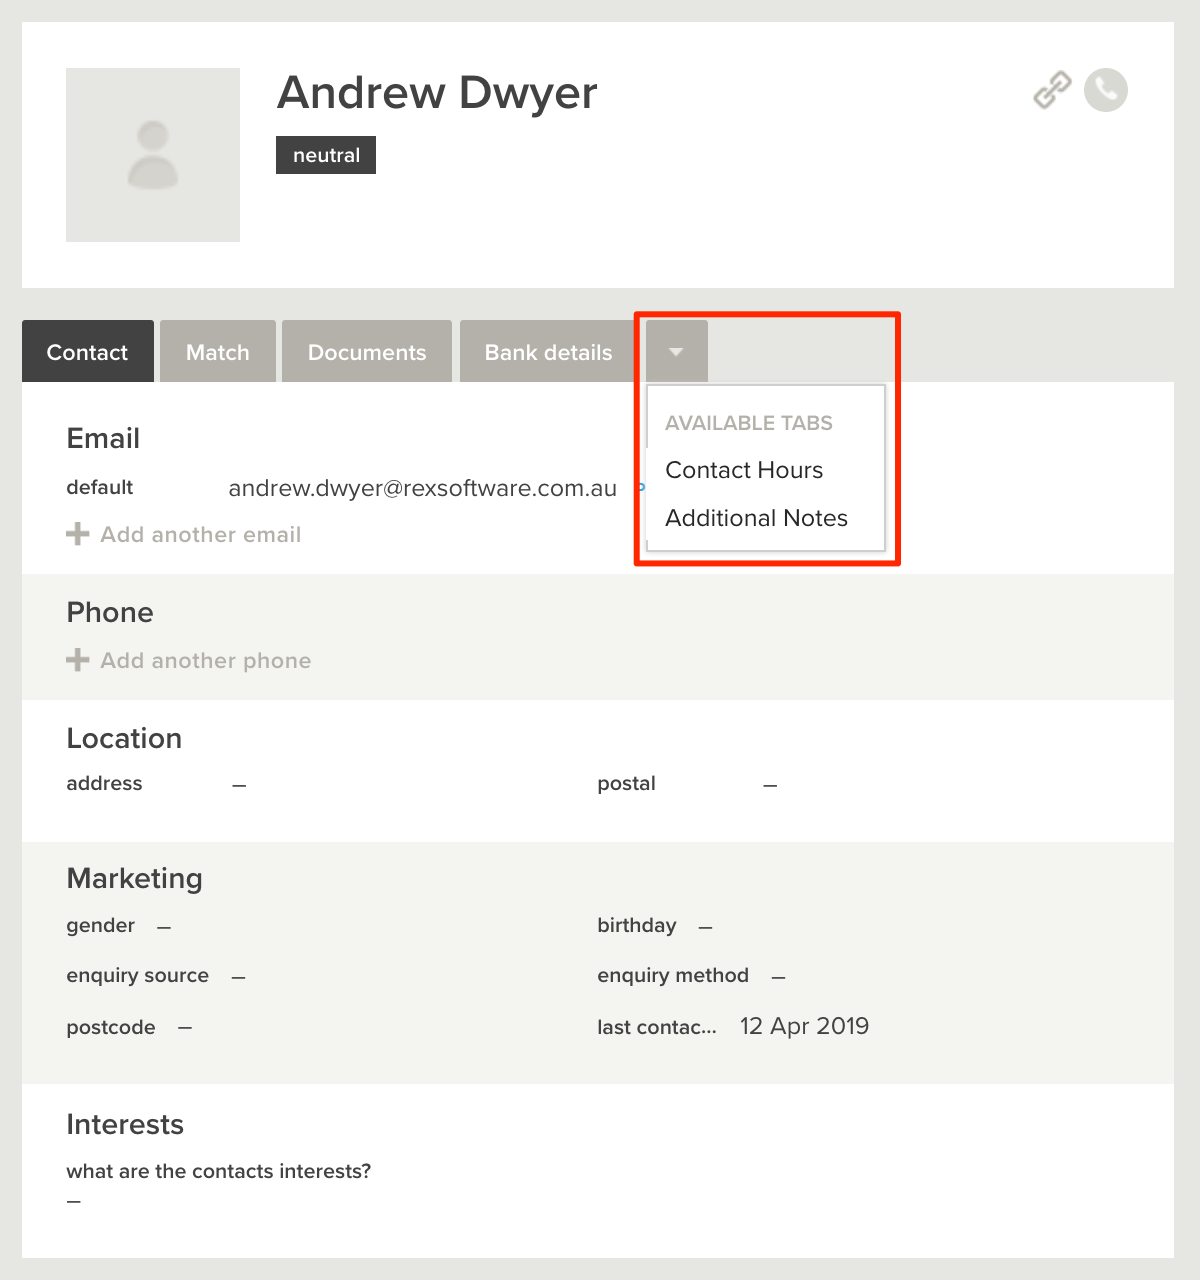
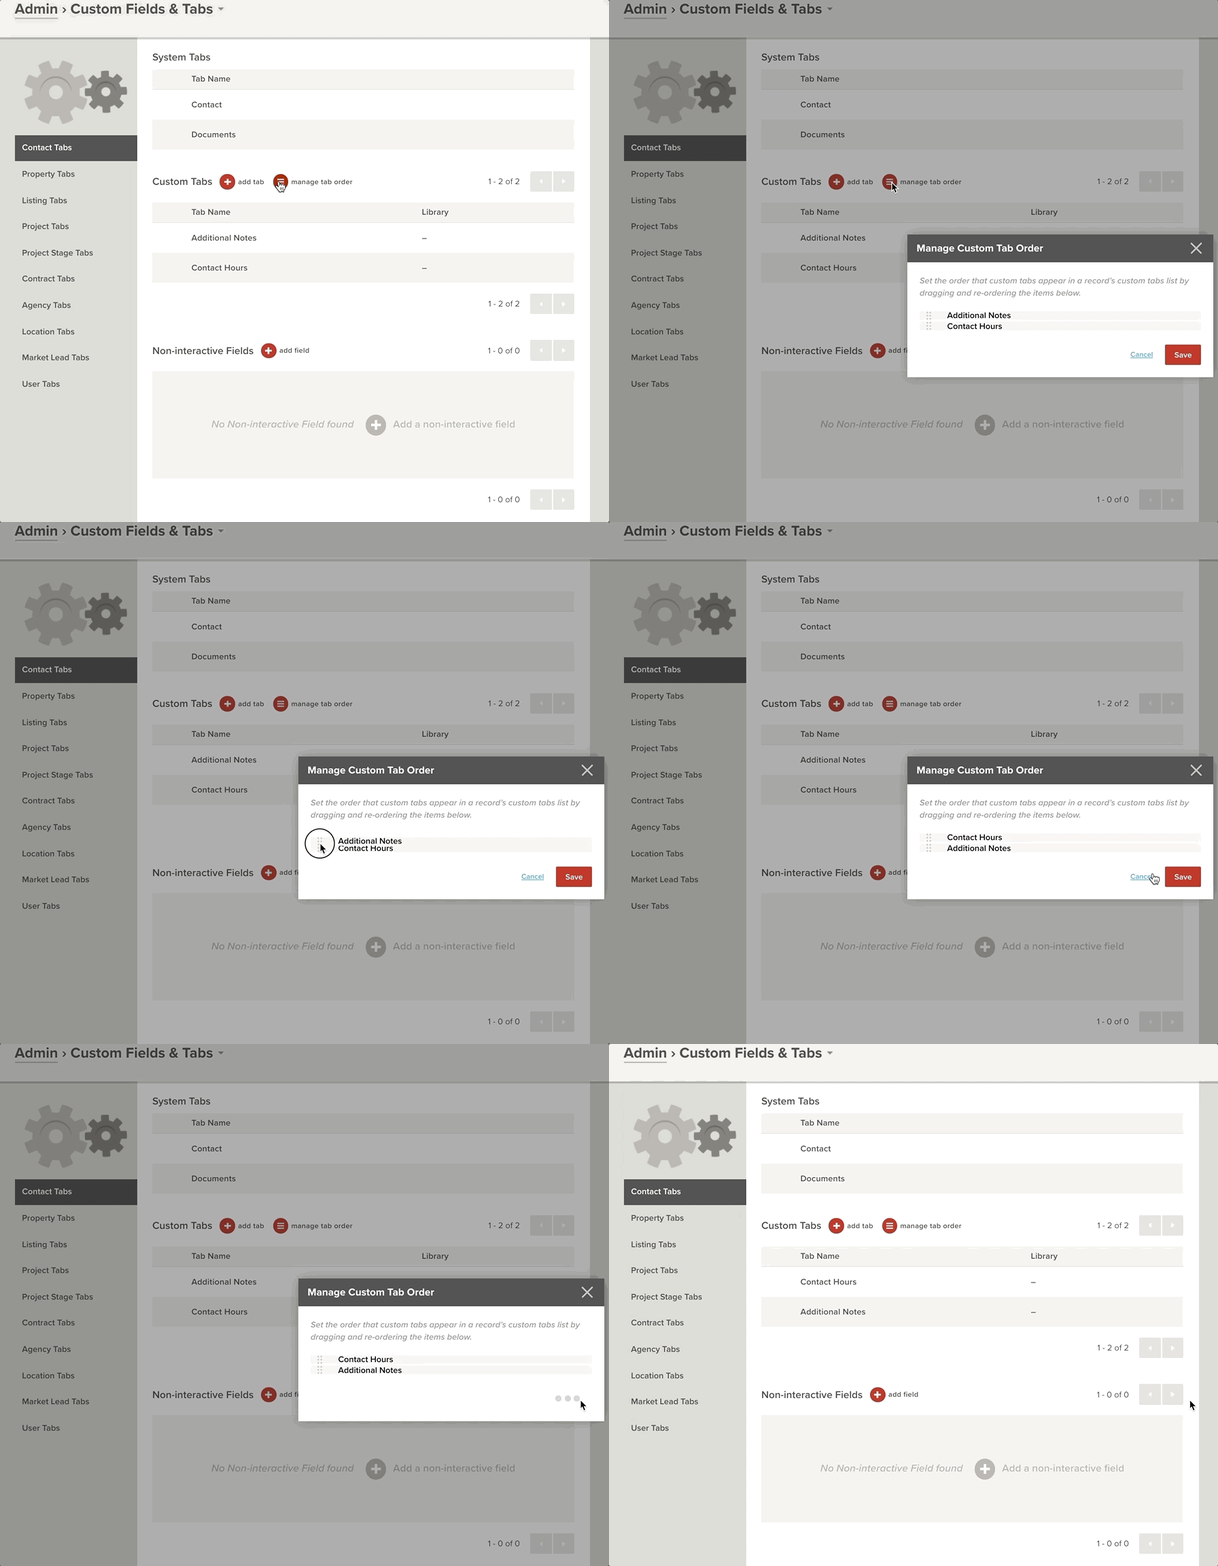
The order these tabs are shown in on your records can be managed from the Custom Fields and Tabs section of the Admin menu. While viewing your Custom Tab lists;
- Click Manage Tab Order
- Drag and drop your Tabs into the correct order
- Click Save when you're done
The order set here sets the order that the Custom Tabs are shown on the dropdown in record view.
Non-Interactive Fields
Non-interactive fields are invisible fields attached to records that allow you to add data using the Rex API. You can include these fields in other workflows such as reports and mail merge.
To add a non-interactive field:
- Select Add Field
- Choose the type of field
- Add the title and select done